
If your fusing press is set up wrong, or your operators are guessing at temperature and dwell time, you’ll see it later, bubbling on the collar, a placket that peels after one wash, a cuff that feels stiff instead of crisp. None of these are fabric problems. They’re application problems, and they’re almost always fixable once you know exactly what you’re doing at the press.
We supply this Non Woven Interlining fabric to garment factories across India every day at Double Ghoda, and we get asked the same application questions on repeat. This guide walks you through the process step by step, from what to check before you start, to the exact settings that get a clean, lasting bond every time.
Table of Contents
- Step 1: Know Where Non-Woven Interlining Fits in Your Production
- Step 2: Gather Your Materials and Equipment
- Step 3: Cut, Align and Position the Interlining
- Step 4: Set the Correct Temperature, Time and Pressure
- Step 5: Fuse, Cool and Avoid Common Mistakes
- Step 6: Choose a Reliable Interlining Supplier
- Step 7: Source Non-Woven Interlining from Double Ghoda
Step 1: Know Where Non-Woven Interlining Fits in Your Production
Non woven fusible interlining is a bonded fibre fabric coated on one side with a heat-activated adhesive. Unlike woven interlining, which is made from yarns running in two directions, non woven interlining fabric is built from randomly bonded fibres pressed into a sheet. This gives it a soft handle, good elasticity, and a lighter, more flexible feel than a woven construction, which is exactly why it’s used differently.
You’ll typically reach for it when you need to:
- Stiffen and stabilise collars and cuffs on shirts
- Reinforce shirt plackets before button placement
- Add light structure to womenswear panels without adding bulk
- Fuse small parts and trims where you want support, not rigidity
- Apply it as a full-front fuse on lighter garments that don’t need heavy structure
It’s not the right choice for suits, sherwanis or heavy structured jackets, that’s where you’d move to a woven interlining instead, since those garments need the tensile strength and firm shape retention a woven construction gives. Non woven interlining fabric is built for the lighter, precision jobs: the parts of a garment that need body and stability, not full structural support.
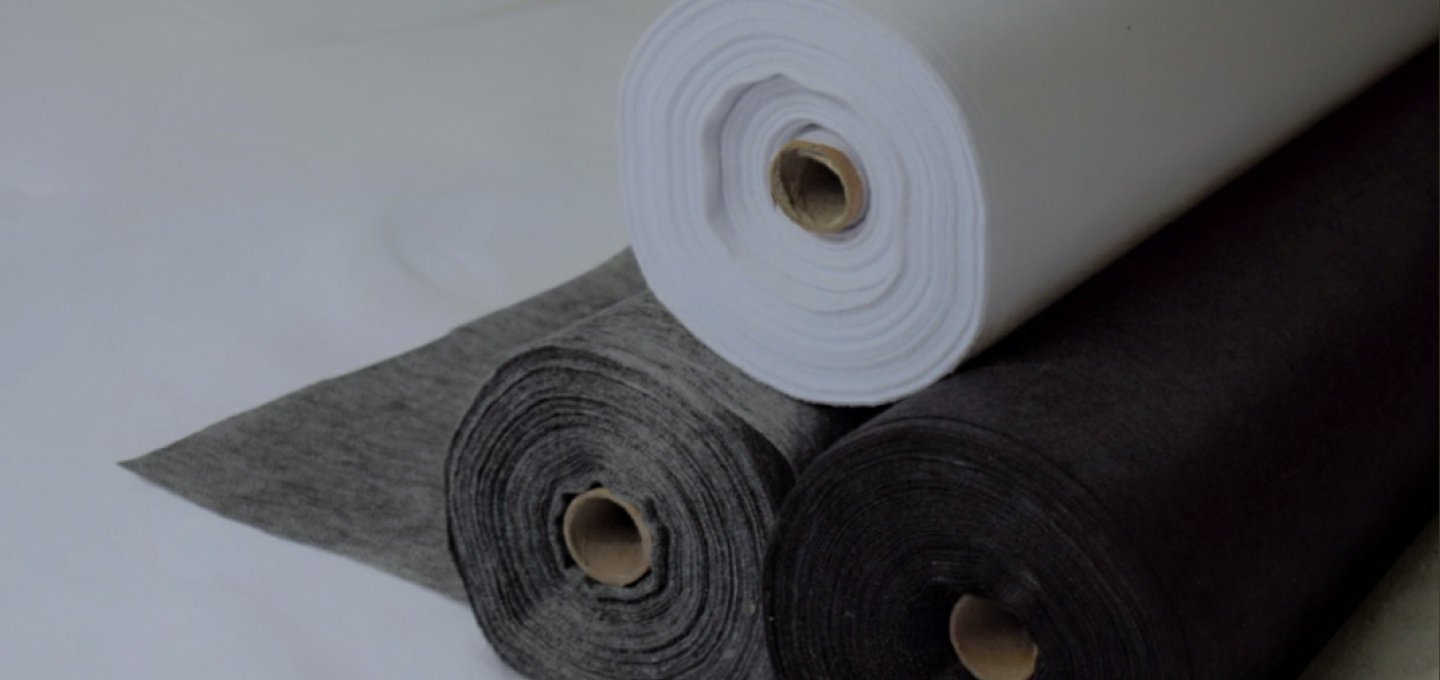
At Double Ghoda, our non woven fusible interlining is made from 100% polyester base fabric with a PES thermo-bond adhesive, available in white, black and charcoal, across a 30–82 GSM weight range and 100cm width. It carries STANDARD 100 by OEKO-TEX® certification, so you’re working with a material that’s tested for harmful substances before it ever reaches your press.
Step 2: Gather Your Materials and Equipment
Getting a clean fuse starts before you switch the press on. A few checks up front save you a lot of rework later.
Equipment:
- A flatbed fusing press or a continuous fusing press, correctly calibrated for temperature and pressure
- A pressure gauge to confirm your press is actually delivering the kg/cm² you think it is
- A clean pressing surface, residue from previous fusing jobs can transfer onto your fabric
Materials:
- Your interlining, cut and ready in the correct GSM for the garment part
- The fashion fabric, cut to matching or slightly oversized panels
- A test swatch of both, for a trial fuse before you run production
Checks:
- Confirm the GSM you’ve selected matches the garment part, lighter GSM for collars and cuffs, slightly heavier for full-front application on lighter garments
- Check which side carries the adhesive coating, it should feel slightly rougher or tackier than the reverse
- Run a single test fuse and let it cool fully before inspecting the bond
- Adjust press settings based on that test, not on settings used for a different fabric or a different roll
Skipping the test fuse is the single most common reason factories end up with a batch of bubbled or under-bonded pieces partway through a production run. It takes a couple of minutes and saves you from discovering a bonding problem only after fifty panels are already cut, pressed and sitting in a reject pile. Treat it as a standard step on every new roll, not an optional extra you skip when the line is running behind schedule.
Step 3: Cut, Align and Position the Interlining
Once your press is calibrated and your materials are checked, the first part of the fusing process is straightforward. Here’s how to do it correctly.
- Cut to size. Cut your interlining to match the shape of the fabric panel you’re reinforcing, collar, cuff, placket or full front. Leave a small margin if your pattern calls for it, and trim after fusing rather than before.
- Align the adhesive side correctly. Place the coated, rougher side of the interlining against the wrong side of your fashion fabric. Getting this reversed is one of the most common, and most costly, mistakes on the factory floor, since a misaligned fuse won’t bond at all.
- Position on the press. Lay the fabric and interlining flat on the pressing bed, smoothing out any creases or trapped air before you close the press. Wrinkles at this stage get baked into the finished piece.
Step 4: Set the Correct Temperature, Time and Pressure
With your panel cut, aligned and positioned, close the press and hold for the exact time and temperature specified for your fabric weight. This is where most quality issues actually originate. Non woven interlining bonds within a fairly specific window, and pushing outside it in either direction causes problems, too little heat or pressure and the bond doesn’t set; too much and you risk adhesive strike-through or a stiff, board-like handle.
Here’s a practical reference table for standard press types:
| Press Type | Temperature | Pressure | Time |
| Flatbed pressing machine | 130–150°C | 0.8–2.0 kg/cm² | 12–16 seconds |
| Continuous pressing machine | 125–140°C | 1.0–2.0 kg/cm² | 12–18 seconds |
A few practical notes on using this table:
- Start at the lower end of the temperature range and adjust upward only if your test fuse doesn’t bond fully
- Heavier GSM interlining generally needs the higher end of the pressure range to achieve full adhesive contact
- Machine calibration drifts over time, recheck your actual press temperature with a separate thermometer periodically, since the dial reading and the actual platen temperature don’t always match
- Dry cleaning and 40°C wash compatibility depend on getting a full, even bond at these settings, an under-fused panel will fail wash testing even if it looks fine straight off the press
Step 5: Fuse, Cool and Avoid Common Mistakes
Once the press cycle finishes, let the fused panel cool fully on a flat surface before you move, fold or stack it, handling a hot fuse can shift the bond before it’s set, causing edge lifting later. Then inspect the bond: check for even adhesion across the whole panel, with no bubbling, no unbonded edges, and no visible adhesive strike-through on the face side of the fabric. If anything looks off, adjust your settings before continuing the run.
Most fusing problems trace back to one of a handful of recurring mistakes. Here’s what to watch for on your line:
| Mistake | What Happens | Fix |
| Fusing the wrong side | No bond forms at all | Check for the coated, tackier side before cutting |
| Skipping the test fuse | Batch-wide bonding issues discovered too late | Always run one test piece per new roll or GSM change |
| Handling while still hot | Edge lifting and shifted bond | Let every panel cool fully before moving it |
| Wrong GSM for the garment part | Collar feels too stiff, or placket feels too soft | Match GSM to the specific part, not the whole garment |
| Press temperature drift | Inconsistent bonding across a run | Recalibrate and spot-check temperature regularly |
| Creases trapped under the press | Visible lines baked into the finished panel | Smooth the fabric fully before closing the press |
| Reusing settings across different rolls | Inconsistent results between batches | Re-test when you switch rolls, even from the same supplier |
If you’re seeing repeated bonding failures despite correct press settings, it’s worth checking the interlining itself, inconsistent adhesive coating between batches is a supplier quality issue, not an application one, and no amount of press adjustment will fix it. Keep a short log of which roll and batch each production run used; it makes tracing a recurring bonding issue back to its source far faster than trying to remember which roll was on the press three days ago.
Step 6: Choose a Reliable Interlining Supplier
Good application technique only gets you so far if the fabric itself isn’t consistent. A roll with uneven adhesive coating will give you unpredictable results no matter how carefully you follow the process above, some sections bond cleanly, others don’t, and you won’t know which is which until the pieces come off the press.
A few things worth checking with any supplier before you commit to a bulk order:
- Is the adhesive coating even across the full roll, not just at the point you sampled?
- Is the GSM consistent batch to batch, so your press settings don’t need constant readjustment?
- Do they hold ready stock, so you’re not waiting on an import cycle mid-production?
- What colours and widths are available, and do they match your garment requirement?
Step 7: Source Non-Woven Interlining from Double Ghoda
This is exactly what we focus on at Double Ghoda. Our non woven interlining is made with super hotmelt adhesive through a double dot treatment, giving even coverage across the full width of the roll. We stock the full 30–82 GSM range in white, black and charcoal, supplied in 100-yard rolls with six rolls per bale, and every batch carries the same fusible performance so your press settings stay consistent from one order to the next.
We work directly with garment factories, shirt manufacturers and formal wear units across India, supplying from ready stock at our Bhiwandi, Maharashtra warehouse rather than making you wait on an import cycle. If you tell us your garment type and the part you’re reinforcing, collar, cuff, placket or full front, we’ll help you land on the right GSM and colour before you commit to bulk quantity, and we can send samples so you can run your own test fuse before placing the order.
Frequently Asked Questions
What is non-woven fusible interlining used for? It’s used to add structure and stability to lighter garment parts, collars, cuffs, shirt plackets and womenswear panels, without adding the bulk or rigidity of a woven interlining. It’s applied with heat and pressure, bonding permanently to the fashion fabric.
How do I fuse non-woven interlining correctly? Cut it to shape, place the coated side against the wrong side of your fabric, and press at the correct temperature and time for your fabric weight, typically 130–150°C for 12–16 seconds on a flatbed press. Let it cool fully before handling.
What temperature should I use to fuse non-woven interlining? For a flatbed pressing machine, use 130–150°C with 0.8–2.0 kg/cm² pressure for 12–16 seconds. For a continuous pressing machine, use 125–140°C with 1.0–2.0 kg/cm² pressure for 12–18 seconds. Always confirm with a test fuse before running a full batch.
Why is my non-woven interlining not bonding properly? The most common causes are fusing the wrong side (the adhesive-coated side must face the fabric), insufficient press temperature or time, or inconsistent adhesive coating on the roll itself. Run a test fuse and check both your settings and the fabric batch before troubleshooting further.
What is the difference between woven and non-woven interlining? Woven interlining is made from yarns running in two directions, giving it higher tensile strength, best for suits, blazers and sherwanis. Non-woven interlining is made from bonded fibres, giving it a softer handle and more flexibility, best for collars, cuffs, plackets and lighter garment parts.
Which GSM of non-woven interlining should I use for shirt collars? Lighter GSM grades, generally in the 30–50 GSM range, work best for shirt collars and cuffs, giving structure without stiffness. Heavier GSM within the available range suits full-front application on lighter garments where more body is needed.
Can non-woven interlining be used on womenswear? Yes. Non-woven interlining’s soft handle and elasticity make it well suited to womenswear, where you want light structure and support without the fabric feeling stiff or heavy against the body.
Is non-woven interlining washable or dry-clean safe? Correctly fused non-woven interlining holds up to washing at 40°C and standard dry cleaning. Bond durability depends on getting the fusing temperature, pressure and time right at application, since an under-fused panel is more likely to fail during cleaning.
Link of related Articles
- Lightweight Interlining vs. Heavyweight Interlining
- A Beginner’s Guide to Interlining
- Choosing the Right Interlining