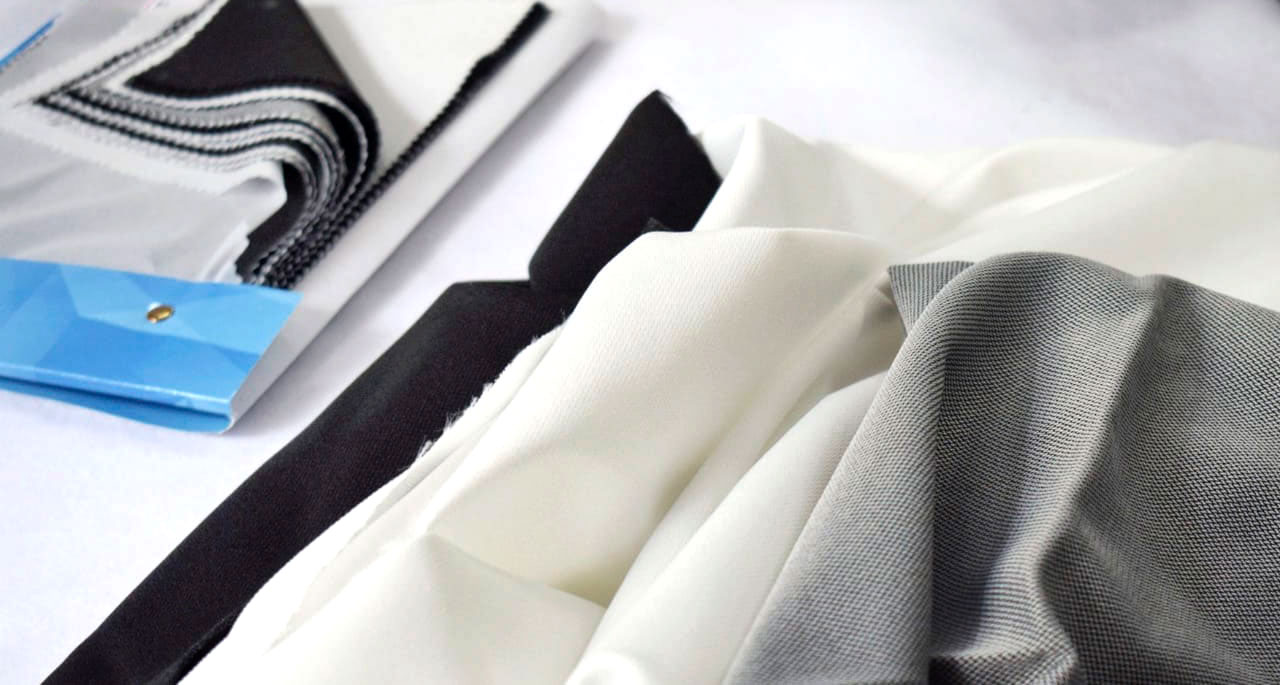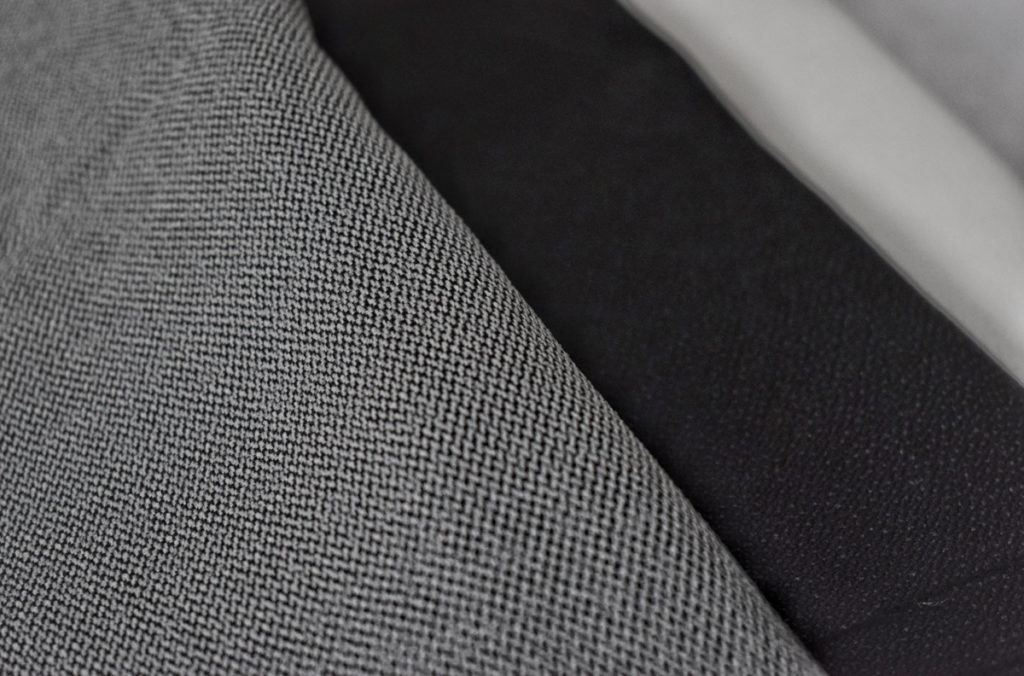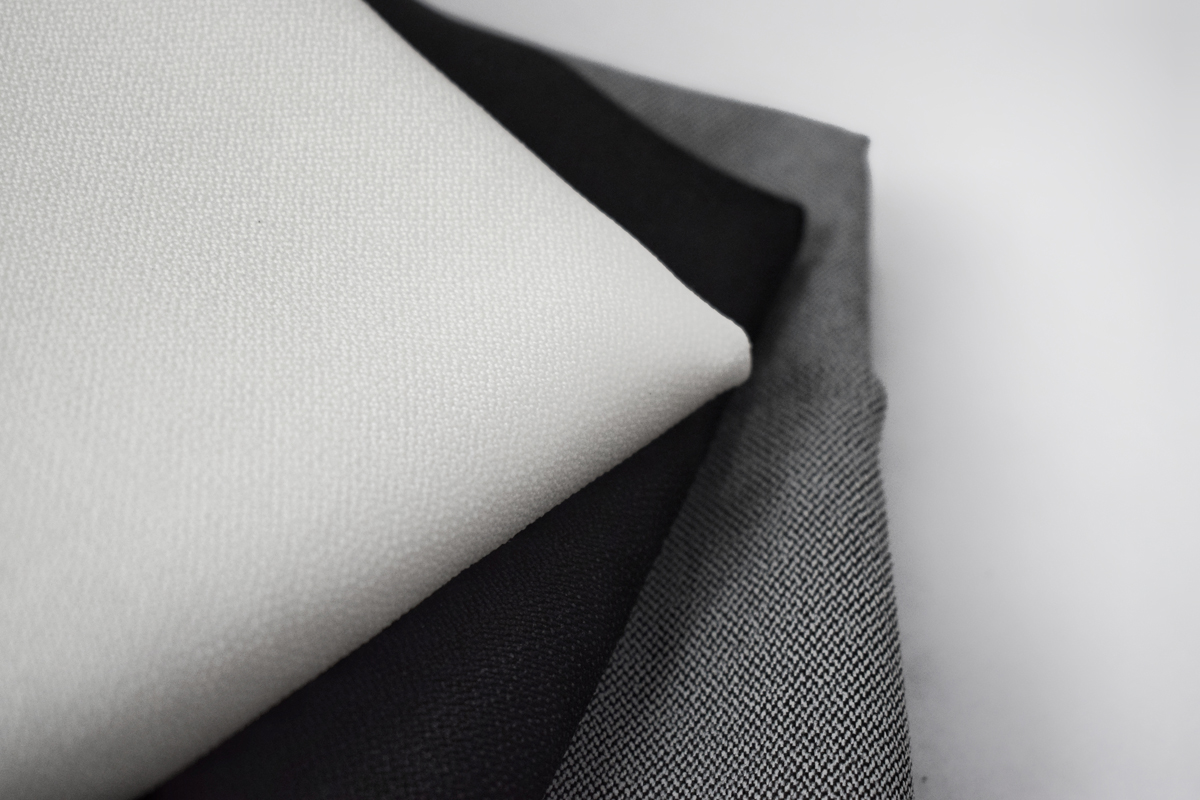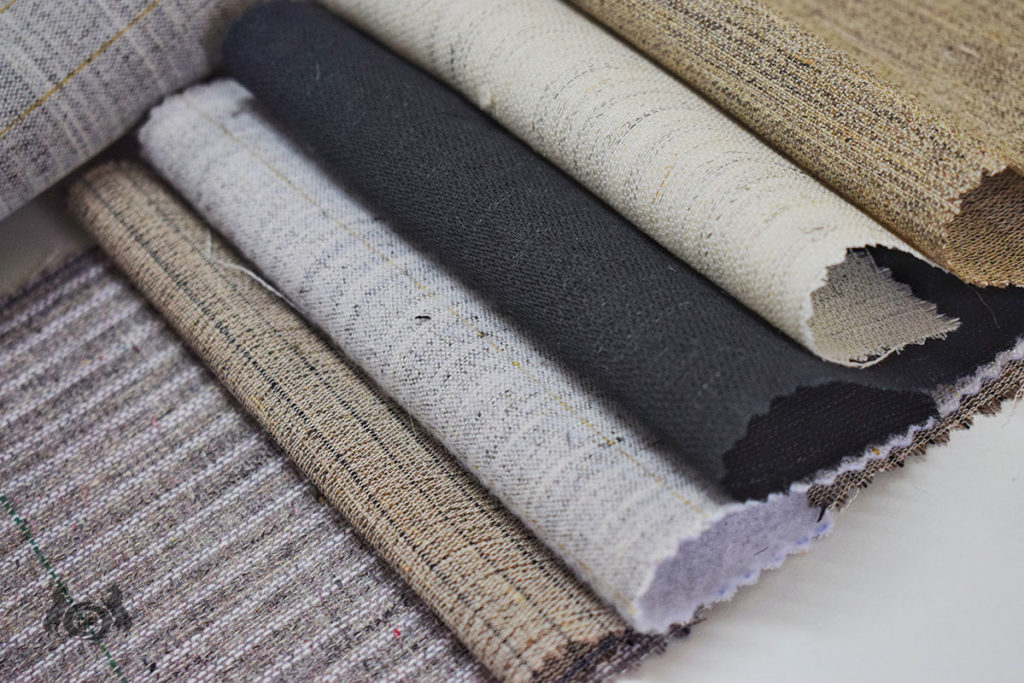
Choosing the right interfacing can make a big difference in the outcome of your sewing project. This guide will help you understand the key differences between non-woven and woven interfacing, so you can select the perfect one for your next creation.
Whether you’re a seasoned seamstress or a beginner, understanding the nuances of non-woven interlining and woven interlining is essential for achieving professional results. Let’s dive in!
Table of Content
What is Interfacing?
What is Non-Woven Interfacing?
What is Woven Interfacing?
Key Differences Between Non-Woven and Woven Interfacing
Choosing the Right Interfacing for Your Project
How to Apply Interfacing
Conclusion
What is Interfacing?
Interfacing, often referred to as interlining fabric, is a supportive material that enhances the structure and shape of your sewing projects. It’s the best for your garment, providing the essential support needed to prevent sagging and maintain its form. Whether you’re working with fusible interlining or non-woven fusible interlining, understanding its role is crucial.
What is Non-Woven Interfacing?
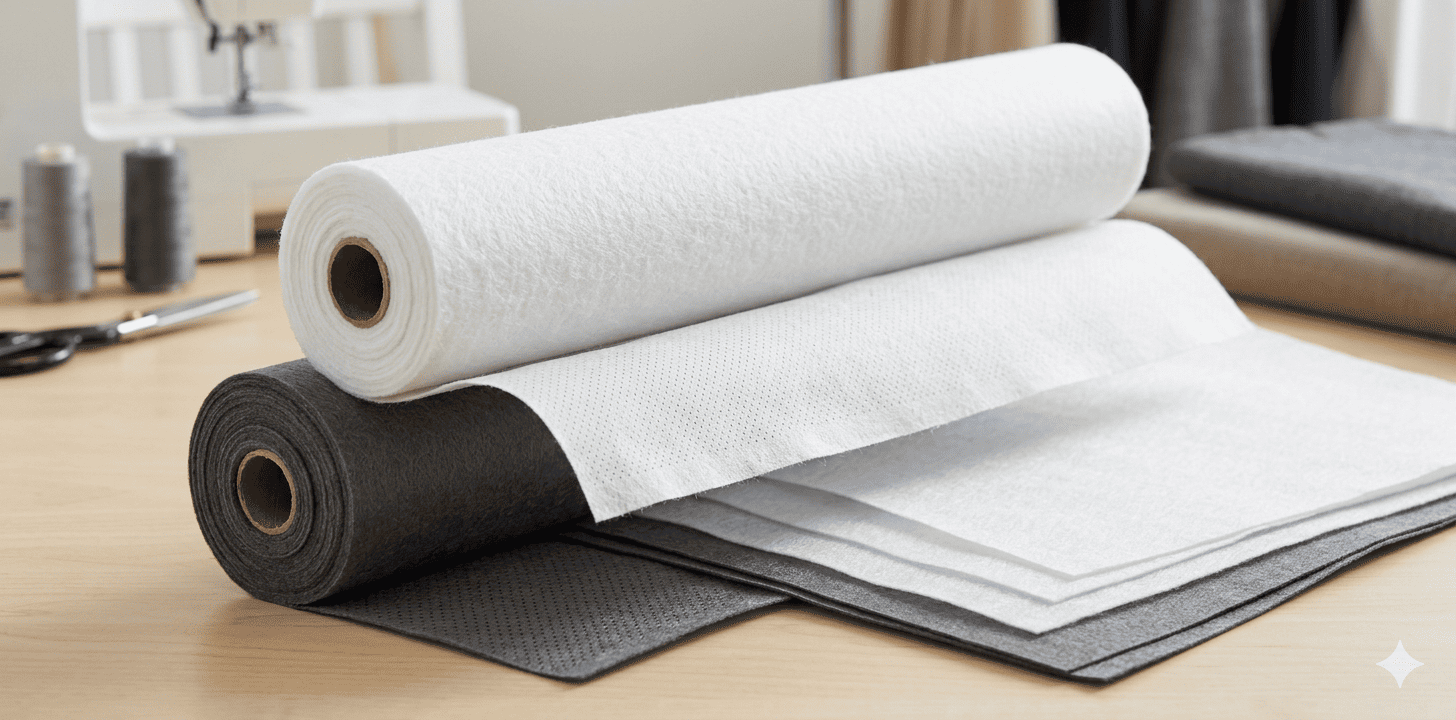
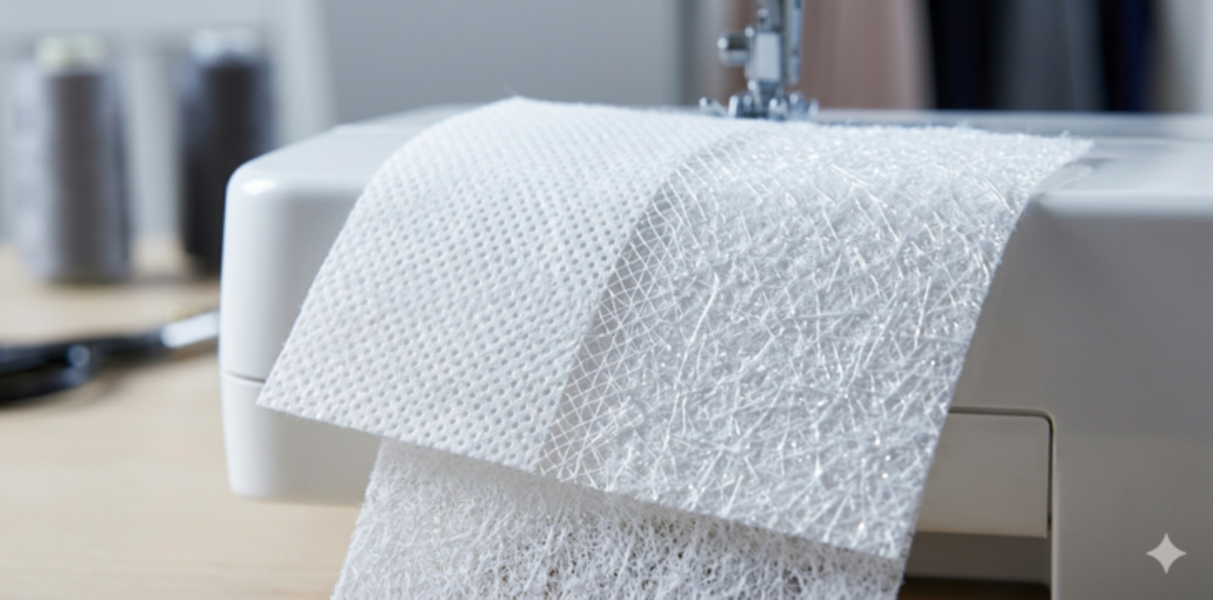
Non-woven interfacing, a type of non-woven interlining, is created by bonding fibers together rather than weaving them. This process results in a softer, more flexible material compared to its woven counterpart.
Key characteristics of non-woven interfacing:
Soft and flexible: Ideal for drapey garments and delicate fabrics.
Versatile: Available in a wide range of weights to suit different projects.
Easy to work with: Often fusible, making application quick and easy.
What is Woven Interfacing?
Woven interfacing, a form of woven interlining fabric, is constructed by interlacing threads in a specific pattern. This method creates a stiffer, more structured material than non-woven interfacing.
Key characteristics of woven interfacing:
Stiff and supportive: Perfect for structured garments, collars, and cuffs.
Durable: Offers excellent shape retention and longevity.
Precise application: Typically sewn into place for added control.
Key Differences Between Non-Woven and Woven Interfacing
Drapey garments: A non-woven interliningwill help maintain the drape while providing gentle support.
Structured garments: A woven interliningwill offer the necessary stiffness and shape retention.
Collars and cuffs: A woven interliningis ideal for these areas due to its supportive properties.
How to Apply Interfacing
The application method varies depending on the type of interfacing.
Non-woven fusible interlining: Apply heat according to the manufacturer’s instructions.
Non-woven sewn interfacing or woven interfacing: Stitch the interfacing to the fabric using a matching thread.
Conclusion
Picking the right stuff to make your clothes look good is important. Knowing the difference between the two kinds of interfacing will help you choose the best one for your project. By understanding the nuances between non-woven interliningand woven interlining, you can make informed decisions to enhance your sewing projects.
Shweta, a textile designer with a keen eye and deep knowledge of fabrics, translates her passion into unique designs. She loves to share her expertise and ignite a love for textiles in others. Dive into the world of fabrics with Shweta!
Don’t like the trouble with fusible interlining? Many people feel the same way. It’s a common choice to make clothes stronger, but it can be hard to use and sometimes mess up your work. There are lots of other things you can use instead!
Interlining is a special fabric that helps clothes keep their shape. It comes in two main types: woven and non-woven. Fusible interliningis a kind of non-woven interlining that sticks with heat. It can be tricky, so let’s look at some other options.
Table of Content
What is Fusible Interlining and Why You Might Want Alternatives
Best Alternatives to Fusible Interlining
How to Choose the Right Alternative
Tips for Using Alternatives to Fusible Interlining
Conclusion
What is Fusible Interlining and Why You Might Want Alternatives
Fusible interlining, a type of non-woven interlining, is a fabric with a heat-sensitive adhesive on one side. It’s widely used in the garment industry for stiffening and stabilizing fabrics. However, it has its downsides:
Can melt or shift: Applying too much heat can ruin your project.
Stiffness: It can add unwanted stiffness to delicate fabrics.
Environmental concerns: Some prefer to avoid synthetic materials.
Best Alternatives to Fusible Interlining
Peltex: A Woven Interlining Powerhouse
Peltex is a woven interlining fabric that’s a popular choice among sewers. Known for its durability and stability, it’s an excellent alternative to fusible interlining. Made from a blend of cotton and polyester, Peltex offers a balance of strength and softness. It’s often used in tailoring and dressmaking for garments that require extra support, such as jackets, coats, and blazers.
Woven Interfacing: Versatility at Its Best
Woven interfacing is a versatile interlining fabric that comes in various weights and finishes, making it suitable for a wide range of sewing projects. Unlike fusible interlining, it doesn’t rely on heat for attachment, offering more control and precision. You can choose from lightweight options for delicate fabrics to heavier ones for structured garments. Woven interfacing provides excellent support and shape retention, making it a preferred choice for many sewers. It’s also durable and can withstand multiple washes and wears. However, it does require additional stitching to attach it to the fabric, which might be a drawback for some.
Lightweight woven interfacing: Ideal for delicate fabrics like chiffon, voile, and organza.
Medium-weight woven interfacing: Suitable for most woven fabrics, including cotton, linen, and wool.
Heavyweight woven interfacing: Perfect for structured garments like jackets, coats, and blazers.
Knit Interfacing: Perfect for Stretchy Fabrics
Knit interfacing is a must-have for stretchy fabrics. Unlike woven interfacing, it moves with the fabric, providing support without restricting movement. This makes it ideal for garments like t-shirts, dresses, and activewear. Knit interfacing comes in different weights and thicknesses, allowing you to choose the right level of support for your project. It’s also typically softer and more flexible than woven interlining, making it comfortable to wear. While knit interfacing might not be as strong as woven interfacing for heavily structured garments, it excels at providing support and shape retention for stretchy fabrics.
Stabilizers: Temporary Support for Delicate Fabrics
Stabilizers are temporary supports that provide additional structure to delicate fabrics or intricate designs. They are crucial when working with sheer fabrics, lace, or embroidered materials, as they prevent distortion and maintain the fabric’s integrity during the sewing process of woven interlining. Stabilizers come in various types, each with its own unique properties and applications:
Water-soluble stabilizers: These dissolve in water, making them ideal for temporary support during embroidery or appliqué. Once the stitching is complete, simply rinse the stabilizer away to reveal the finished design.
Tear-away stabilizers: These can be easily torn away from the fabric after stitching, leaving a clean finish. They are commonly used for embroidery, quilting, and appliqué.
Cut-away stabilizers: These require cutting close to the stitches to remove them. They offer the highest level of support and are often used for heavy embroidery or intricate designs.
When choosing a stabilizer, consider theinterlining fabricweight, design complexity, and desired level of support.
Other Interlining Options
While not as common, options like horsehair braid, buckram, and handmade paper can be used for specific purposes.
Choosing the Right Interlining

Selecting the best interlining fabric depends on your project, and personal preference. Consider these factors:
Fabric weight: Lighter fabrics need lighter interlining or stabilizer.
Project type: Garments require durable interlining, while crafts might need a stabilizer.
Desired stiffness: Determine the level of support needed.
Skill level: Beginners might prefer pre-cut stabilizers or fusible interlining.
Use the correct needle and thread: Match them to your fabric and interlining.
Baste carefully: Secure your interlining with basting stitches.
Press gently: Avoid excessive heat when pressing.
Conclusion
There are lots of ways to make your clothes strong, not just fusible interlining. You can use woven Interlining fabric, stretchy fabric, or special helpers. The best one is up to you. Try different kinds to see what you like. Don’t worry about that sticky stuff anymore! Use these other ways to make great clothes.
Shweta, a textile designer with a keen eye and deep knowledge of fabrics, translates her passion into unique designs. She loves to share her expertise and ignite a love for textiles in others. Dive into the world of fabrics with Shweta!
Hey there! Have you ever stood in front of your closet, staring at your button coat and wondering how to style it? Button coats are versatile and timeless, but sometimes, figuring out the best way to wear them can be a challenge. Whether you’re aiming for a casual look or something more formal, I’ve got you covered. Let’s dive into some great tips on how to style a button coat.
Table of Content
Choosing the Right Button Coat
Casual Styling Tips
Formal Styling Tips
Accessorizing Your Button Coat
Seasonal Styling Ideas
Care and Maintenance of Your Button Coat
Conclusion
Choosing the Right Button Coat
Before we get into styling, let’s talk about choosing the right button coat. Here are a few things to consider:
Material: Wool, cotton, or synthetic?
Length: Short, mid-length, or long?
Fit: Tailored, loose, or somewhere in between?
Color: Classic black, trendy camel, or a pop of color?
Make sure you pick a coat that suits your body type and personal style. If you’re unsure, a classic black or navy button coat is always a safe bet.
Casual Styling Tips
Styling a button coatfor a casual look can be fun and easy. Here are some ideas:
With Jeans: You can’t go wrong with jeans. Pair your button coat with your favorite jeans and a comfy sweater. This look is perfect for a day out or a casual lunch.
Over a Hoodie: Layering your coat over a hoodie gives a relaxed vibe. It’s trendy and keeps you warm.
Sneakers: Complete your casual look with a pair of stylish sneakers. They add a cool, laid-back touch to your outfit.
Formal Styling Tips
When it comes to formal occasions, your button coatcan be a game-changer. Here’s how you can style it:
Over a Suit: Wear your button coatover a suit for a polished look. Make sure the coat is longer than your suit jacket.
Dress and Heels: If you’re heading to an evening event, pair your coat with a dress and heels. This combination exudes elegance.
Accessories: Add a touch of sophistication with accessories like a silk scarf or a stylish hat.
Accessorizing Your Button Coat
Accessories can make or break your outfit. Here are some must-have accessories for your button coat:
Scarves: A chunky knit scarf for winter or a light silk scarf for spring can add flair to your look.
Hats: A beanie for casual outings or a fedora for a more sophisticated touch.
Belts: Cinch your waist with a belt to add shape and definition to your coat.
Seasonal Styling Ideas
Your button coatcan be styled differently depending on the season. Let’s explore some seasonal styling ideas:
Winter: Layer your coat over a chunky sweater, add a knit scarf, and wear knee-high boots. This look is warm and stylish.
Spring: Opt for a lighter coat and pair it with a floral dress and ankle boots. Add a light scarf for those chilly mornings.
Fall: Layer your coat over a turtleneck and jeans. Finish the look with a pair of stylish loafers.
Care and Maintenance of Your Button Coat
Taking care of your button coatensures it lasts longer and looks good. Here are some tips:
Regular Cleaning: Follow the care label instructions. Some coats require dry cleaning, while others can be machine washed.
Storage: Store your coat in a cool, dry place. Use a padded hanger to maintain its shape.
Repairs: Fix any loose buttons or small tears immediately to prevent further damage.
Conclusion
Styling a button coatdoesn’t have to be complicated. With these tips, you can create versatile looks for any occasion. Remember, the key is to have fun and experiment with different styles. So next time you pull out your button coat, you’ll know exactly how to style it.
Shweta, a textile designer with a keen eye and deep knowledge of fabrics, translates her passion into unique designs. She loves to share her expertise and ignite a love for textiles in others. Dive into the world of fabrics with Shweta!
When it comes to sewing and textile projects, choosing the right interlining fabriccan make a huge difference in the outcome. Interlining is a crucial component that adds structure, support, and durability to fabrics, helping to shape and reinforce garments and other items. But with so many options available, especially when it comes to lightweight versus heavyweight interlining, it can be challenging to know which one to choose.
Table of Content
Introduction to Interlining
What is Lightweight Interlining?
What is Heavyweight Interlining?
Differences Between Lightweight and Heavyweight Interlining
Applications of Lightweight and Heavyweight Interlining
How to Choose the Right Interlining for Your Project
Conclusion
Introduction to Interlining
Interlining refers to a layer of fabric placed between the outer fabric and the lining in a garment. Its primary function is to provide additional support and shape, making your clothes look more polished and professionally finished. Interlining plays a crucial role in garment construction and other textile projects, providing the necessary support and structure to your fabric.
What is Lightweight Interlining?
Lightweight interlining is a thin, flexible material used to give subtle support and structure to delicate fabrics. It’s often made from non-woven interliningmaterials, but you can also find lightweight woven interlining.
Features of Lightweight Interlining
Thin and flexible: Perfect for maintaining the softness and drape of lightweight fabrics.
Breathable: Does not add bulk or stiffness.
Easy to work with: Ideal for projects where you need a light touch.
Lingerie: Provides subtle support while keeping the fabric soft, often using non-fusible interlining for comfort.
Sheer fabrics: Adds just enough structure to prevent flimsy appearances, making it ideal for non-woven interlining fabric.
What is Heavyweight Interlining?
Heavyweight interlining is a thicker, sturdier material used to provide strong support and structure. It can be made from non-woven interlining fabrics or woven interlining fabricsand is designed to handle heavier fabrics and more demanding applications.
Features of Heavyweight Interlining
Thick and sturdy: Offers substantial support and durability.
Adds structure: Perfect for maintaining the shape of heavyweight fabrics.
Long-lasting: Ensures the durability of the finished product.
Common Uses
Coats and jackets: Provides the necessary structure for outerwear, often using woven fusible interlining.
Bags and accessories: Adds firmness and durability, typically with fusible interlining.
Home décor: Ideal for items like curtains, upholstery, and cushions, using lining and interlining fabric for added weight and stability.
Differences Between Lightweight and Heavyweight Interlining
Understanding the differences between lightweight and heavyweight interlining can help you choose the right one for your project.
Weight and Thickness
Lightweight interlining: Thin and flexible, barely noticeable in the final product.
Heavyweight interlining: Thick and sturdy, significantly alters the fabric’s feel and structure.
Support and Structure
Lightweight interlining: Provides gentle support without adding bulk.
Heavyweight interlining: Offers strong support, ideal for maintaining shape and durability.
Applications
Lightweight interlining: Best for delicate and lightweight fabrics, such as silk, chiffon, and lightweight cotton. For example, collar interliningmight use a lightweight option for a softer feel.
Heavyweight interlining: Suitable for heavy fabrics like denim, canvas, and thick wool. Heavyweight interlining is often used in outerwear and home décor items.
Ease of Use
Lightweight interlining: Easier to handle, especially for beginners.
Heavyweight interlining: Requires more skill and care to work with, due to its thickness and rigidity.
Applications of Lightweight and Heavyweight Interlining
Knowing where to use lightweight versus heavyweight interlining can make a big difference in your projects.
Lightweight Interlining Applications
Blouses and Dresses: Lightweight interlining is perfect for adding a bit of structure to delicate garments without making them stiff. It keeps the fabric’s natural drape and flow.
Lingerie: It provides the necessary support for lingerie while keeping it soft and comfortable against the skin.
Sheer Fabrics: For fabrics like chiffon and organza, lightweight interlining adds just enough body to prevent flimsiness without being visible.
Heavyweight Interlining Applications
Coats and Jackets: Heavyweight interlining is essential for outerwear. It gives structure and support, helping the garment hold its shape, often with woven fusible interlining.
Bags and Accessories: For items that need to be durable and sturdy, heavyweight interlining provides the required firmness.
Home Décor: It’s ideal for curtains, upholstery, and cushions, adding the necessary weight and structure with lining and interlining fabric.
How to Choose the Right Interlining for Your Project
Choosing between lightweight and heavyweight interlining depends on your project’s specific needs. Here are some tips to help you decide:
Consider the Fabric
Fabric weight: Match the interlining weight to the fabric weight. Use lightweight interlining for lightweight fabrics and heavyweight interlining for heavyweight fabrics.
Fabric type: Think about the fabric’s texture and drape. Delicate fabrics need gentle support, while sturdy fabrics require strong support.
Think About the Project
Garment type: For structured garments like jackets and coats, heavyweight interlining is the way to go. For softer garments like blouses and dresses, lightweight interlining is better.
Functionality: Consider the purpose of the item. For example, bags and home décor items often need more structure, so heavyweight interlining is suitable.
Test Before You Commit
Sample test: Always test a small piece of interlining with your Interlining fabric before starting your project. This helps you see how the interlining affects the fabric and ensures compatibility.
Adjust as needed: Based on your test, you can adjust the type or weight of the interlining to better suit your needs.
Conclusion
Choosing between lightweight interlining and heavyweight interlining fabric doesn’t have to be confusing. By understanding their differences and knowing how to match them to your fabric and project needs, you can make informed decisions that enhance the quality and durability of your work. Remember to consider the fabric, think about the project’s purpose, and always test before you commit.
Shweta, a textile designer with a keen eye and deep knowledge of fabrics, translates her passion into unique designs. She loves to share her expertise and ignite a love for textiles in others. Dive into the world of fabrics with Shweta!
Have you ever found yourself frustrated with your shirt collars? You’re not alone. Collar interliningcan be a bit tricky to get right, but don’t worry. This Guide will help you troubleshoot common collar interlining issues and make your shirts look crisp and sharp again.
Table of Content
Understanding Interlining Types
What is Collar Interlining?
Common Issues with Collar Interlining
Step-by-Step Guide to Troubleshooting Collar Interlining Problems
Pro Tips for Maintaining Collar Interlining
Conclusion
Understanding Interlining Types
Interlining fabricscome in various weights, textures, and compositions. Here’s a breakdown of common types:
Fusible interlining: This type bonds to the fabric with heat. It’s convenient but can sometimes cause issues if not used correctly.
Sew-in interlining: This requires stitching to attach to the fabric. It offers more control but can be time-consuming.
Horsehair interlining: Known for its stiffness and ability to hold shape, it’s ideal for structured collars.
Woven interlining: Provides support without excessive stiffness.
Non-woven interlining: A versatile option with various weights and textures.
You might be wondering, “What can go wrong with collar interlining?” Quite a bit, actually. Here are some of the most common issues you might face with different interlining types:
Step-by-Step Guide to Troubleshooting Collar Interlining Problems
1. Wrinkling and Bunching
Wrinkling and bunching can be a real nuisance. Here’s how you can tackle it:
Iron Carefully: Use a steam iron on a low heat setting. Iron the collar flat, working from the points towards the center. This works well for both woven interliningand non woven interlining.
Use a Press Cloth: Place a thin, damp cloth over the collar before ironing to protect the fabric and interlining.
Proper Storage: Hang your shirts on padded hangers to prevent wrinkling and bunching.
2. Loss of Stiffness
If your collar feels floppy, try these tips:
Starch Spray: Apply a light mist of starch spray before ironing to add stiffness. This can help rejuvenate interlining in garments.
Replace Interlining: If the stiffness doesn’t return, it might be time to replace the interlining. You can do this yourself if you’re handy with a needle and thread or take it to a tailor who understands the nuances of interlining fabric.
3. Separation
Separation can make your collar look unsightly. Here’s what to do:
Sewing: If glue doesn’t work, consider sewing the interlining back into place. A few well-placed stitches can make a big difference.
4. Discoloration
Discoloration can make your shirt look old and worn out. Here’s how to fix it:
Spot Clean: Use a gentle fabric cleaner to spot clean the affected areas.
Bleach Solution: For white shirts, a diluted bleach solution can help remove discoloration. Be cautious and test on a small area first.
Replace the Collar: If the discoloration is severe, replacing the collar might be the best option, especially if it’s affecting the lining and interlining fabric.
5. Shrinking
Shrinking can be tricky, but here’s what you can do:
Stretch the Collar: While the shirt is still damp, gently stretch the collar back to its original shape.
Professional Help: If shrinking is a recurring issue, consider taking your shirts to a professional cleaner who can handle them with care.
Pro Tips for Maintaining Collar Interlining
To keep your collar interlining in top shape, follow these pro tips:
Regular Maintenance: Regularly check your collars for any signs of wear and tear. Early intervention can prevent bigger problems with your collar interlining.
Proper Laundering: Always follow the care instructions on your shirts. Use gentle detergents and avoid excessive heat.
Storage Solutions: Store your shirts properly to avoid unnecessary stress on the collars. Use padded hangers and avoid overcrowding your closet.
Use Collar Stays: Collar stays can help maintain the shape and stiffness of your collars. Invest in a good set and use them regularly.
Conclusion
Troubleshooting collar interliningdoesn’t have to be a headache. By following these tips and tricks, you can keep your shirts looking sharp and well-maintained, regardless of the type of interlining fabricused. Remember, a well-kept collar can make a huge difference in your overall appearance.
Shweta, a textile designer with a keen eye and deep knowledge of fabrics, translates her passion into unique designs. She loves to share her expertise and ignite a love for textiles in others. Dive into the world of fabrics with Shweta!
Whether you’re a seasoned or just starting your sewing journey, this guide will walk you through everything you need to know about working with this versatile material.Woven interlining fabriccan make your sewing projects stronger and look better!
Table of Content
Getting Started with Woven Interlining
Best Garments for Woven Interlining
Choosing the right Woven Interlining?
Preparing Your Fabric and Interlining
Sewing Techniques
Common Mistakes to Avoid Them
Conclusion
Getting Started with Woven Interlining
Imagine the difference between a limp blouse and a crisp, structured shirt. That’s the magic of interlining. Unlike fusible interlining, which bonds with heat, woven interliningis sewn into place, providing a more durable and flexible foundation for your garments. It’s a type of non-woven fusible interliningthat adds body, shape, and support to fabrics like chiffon, silk, and linen.
Best Garments for Woven Interlining
Wondering when to reach for woven interlining? Here are some key situations:
Structured garments: Jackets, coats, and blazers benefit immensely from woven interlining fabric. It’s essential for achieving those sharp collars, cuffs, and lapels.
Reinforcing delicate fabrics: Give lightweight fabrics like chiffon or silk the support they need with woven interlining.
Creating crisp edges: Achieve professional-looking hems, facings, and buttonholes with this versatile material.
Choosing the Right Woven Interlining
Selecting the appropriate woven interlining is crucial for project success. Consider these factors:
Fabric weight: Match the weight of your main fabric to the interlining fabric for optimal results.
Project requirements: Different areas of your garment might need different interlining types of woven interlining fabric.
Preparing Your Fabric and Interlining
Getting your fabrics prepped and ready is an essential first step in any sewing project, and working with woven interlining is no exception. Here’s what you need to do:
For added strength, consider reinforcing seams with additional rows of stitching.
Hand stitching:
Ideal for delicate fabrics or intricate details.
Use a small, even stitch for a neat finish.
Common Mistakes and How to Avoid Them
Everyone makes mistakes, but these tips can help you avoid common pitfalls:
Choosing the wrong weight: Aninterlining fabricthat’s too heavy can ruin the drape of your fabric.
Incorrect placement: Ensure the woven interlining is positioned correctly to prevent visible lines or puckering.
Skipping basting: Basting is essential for accurate placement and preventing shifting.
Using the wrong stitch: The wrong stitch can weaken the bond between the fabrics.
Conclusion
When you get the hang of sewing with woven interlining, your sewing skills will be even better! By learning about the different kinds of woven interlining fabricsand getting your fabrics ready in the right way, and using the correct sewing methods, you’ll make clothes that are both beautiful and last a long time.
Shweta, a textile designer with a keen eye and deep knowledge of fabrics, translates her passion into unique designs. She loves to share her expertise and ignite a love for textiles in others. Dive into the world of fabrics with Shweta!
If you work in fashion or textiles, you’ve likely heard of non-woven interlining. But what is it, and why is it so important? In simple terms, non-woven interlining is a material used to give fabrics structure and support. Unlike woven interlining fabric, made by weaving threads together, non-woven interlining fabricis made by bonding fibers together. This makes it versatile, cost-effective, and easy to use.
Understanding the different interlining types, weights, and uses of non-woven interlininghelps you make better choices for your projects. Whether you’re a pro or a DIY enthusiast, I’m here to help you learn all about non-woven interlining.
Table of Content
Understanding Non-Woven Interlining Fabric
Different Types of Non-Woven Interlining
Weights of Non-Woven Interlining
Applications of Non-Woven Interlining
Choosing the Right Non-Woven Interlining
Conclusion
Understanding Non-Woven Interlining Fabric
Non-woven interliningis a type of fabric used in garment construction and other textile applications to provide structure, support, and reinforcement. Unlike woven interlining fabrics, non-woven interliningis made from fibers that are bonded together through chemical, thermal, or mechanical processes, rather than being woven together.
Different Types of Non-Woven Interlining
Non-woven interliningcomes in several types, each with its own features and uses. Let’s look at the most common ones:
Fusible Non-Woven Interlining
Adhesive backing: Fusible interlining has a glue that activates with heat. Just iron it onto the fabric, and it sticks.
Easy to use: Great for beginners because it’s simple to apply.
Common uses: Perfect for collars, cuffs, and waistbands.
Sew-in Non-Woven Interlining
No adhesive: Sew-in interlining has no glue, so you sew it onto the fabric.
Versatile: Good for delicate fabrics that might get damaged by heat.
Common uses: Ideal for tailored clothes, quilting, and crafts.
Non-Fusible Non-Woven Interlining
Temporary support: Gives temporary support while you sew and can be removed later.
No heat required: Great for fabrics that can’t handle heat.
Common uses: Best for embroidery, appliqué, and delicate fabrics.
Woven Interlining
Woven structure: Made by weaving threads together, giving it a firm structure.
Durable: Strong and long-lasting, suitable for many uses.
Common uses: Often used in tailored garments and structured pieces.
Fusible Woven Interlining
Adhesive backing: Has a glue side that sticks to fabric with heat.
Combination benefits: Combines the structure of woven interlining with the convenience of fusible interlining.
Common uses: Great for collars, waistbands, and other structured areas in garments.
Weights of Non-Woven Interlining
The weight of non-woven interlining is important because it affects how your project looks and feels. Let’s explore the different weights:
Lightweight Non-Woven Interlining
Sheer fabrics: Perfect for lightweight fabrics like silk and chiffon.
Subtle support: Adds structure without making the fabric too stiff.
Common uses: Ideal for blouses, dresses, and lingerie.
Medium-Weight Non-Woven Interlining
Versatile: Works with many fabrics, like cotton and polyester.
Balanced support: Gives a good mix of structure and flexibility.
Common uses: Great for jackets, skirts, and casual clothes.
Heavyweight Non-Woven Interlining
Strong support: Offers a lot of structure and durability.
Thick fabrics: Best for heavy fabrics like denim and upholstery.
Common uses: Ideal for coats, bags, and home décor projects.
Applications of Non-Woven Interlining
Non-woven interlining is very useful and can be used in many ways. Here are some common uses:
Garment Construction
Shaping: Helps shape collars, cuffs, and waistbands to keep their form.
Reinforcement: Strengthens parts of clothes that get a lot of wear, like buttonholes and pockets.
Smooth finish: Makes seams and hems look smooth, improving the garment’s appearance.
Craft projects: Perfect for making bags, hats, and other craft items that need extra structure.
Home Décor
Curtains and drapes: Adds weight and stability to curtains and drapes, helping them hang well.
Upholstery: Supports upholstery fabrics, making them durable and polished.
Table linens: Improves the look of tablecloths, placemats, and other table linens by adding structure.
Choosing the Right Non-Woven Interlining
Picking the right non-woven interlining for your project is key to getting good results. Here are some tips to help you choose:
Consider the Fabric
Weight and texture: Match the weight of the interlining to the fabric. Use lightweight interlining for lightweight fabrics, and heavyweight for heavier fabrics.
Heat sensitivity: For delicate fabrics, choose sew-in or non-fusible interlining to avoid damage from heat.
Think About the Project
Garment type: For structured garments like jackets and coats, choose medium to heavyweight interlining.
Craft projects: For crafts and quilting, pick interlining that offers the right balance of stability and flexibility.
Test Before You Commit
Sample test: Always test a small piece of interlining with your interlining fabric before starting your project. This helps ensure compatibility and prevents any surprises.
Adjust as needed: Based on your test, you can adjust the type or weight of the interlining to better suit your needs.
Conclusion
Non-woven interlining is a key part of the textile and fashion industries, providing support, structure, and stability to many projects. By understanding the different interlining types, weights, and uses of non-woven interlining, you can make better choices and get professional-quality results.
The key to success is picking the right interlining for your specific fabric and project. Don’t be afraid to experiment and test until you find the perfect match.
Shweta, a textile designer with a keen eye and deep knowledge of fabrics, translates her passion into unique designs. She loves to share her expertise and ignite a love for textiles in others. Dive into the world of fabrics with Shweta!
Have you ever thought about how the right button can completely change the look of your jacket? Buttons might seem like a small detail, but they play a significant role in the overall style and functionality of your outerwear. Whether you’re refreshing an old favorite or customizing a new piece, understanding the different styles of buttons for jackets can make a big difference.
Table of Content
Classic Button Styles for Jackets
Modern Button Styles for Jackets
Decorative Button Styles for Jackets
Functional Button Styles for Jackets
How to Choose the Right Button Style for Your Jacket
Conclusion
Classic Button Styles for Jackets
When it comes to classic buttons for jackets, you can’t go wrong with these timeless styles. They add a touch of elegance and sophistication to any jacket, making them a favorite choice for many.
Metal Buttons: Think brass or silver-toned buttons that add a bit of shine. They’re perfect for military-inspired jackets and coats, and they also work well on blazer buttons. The weight and durability of metal buttons make them a great choice for heavy fabrics.
Leather Buttons: Leather buttons give a rugged, vintage look. They’re often seen on tweed jackets and rustic outerwear. Leather ages beautifully, adding character over time, and they can be a great choice for a button coat as well.
Horn Buttons: Made from real or imitation horn, these buttons have a natural, earthy appeal. They’re commonly found on blazers and sports jackets, giving them a sophisticated edge. Horn buttons are a classic choice for blazer buttons.
Modern Button Styles for Jackets
If you’re into contemporary fashion, you’ll love these modern button styles. They offer a sleek, updated look that’s perfect for today’s trends.
Snap Buttons: Easy to use and secure, snap buttons are great for casual jackets like bombers and parkas. They provide a clean, minimalistic look and are super functional for any button coat.
Plastic Buttons: Available in a wide range of colors and shapes, plastic buttons are versatile and lightweight. They’re ideal for lightweight jackets and fashion-forward designs.
Magnetic Buttons: A relatively new innovation, magnetic buttons offer a seamless closure. They’re perfect for jackets where you want a smooth, unbroken line and are often used for modern blazer buttons.
Decorative Button Styles for Jackets
Decorative buttons can turn a simple jacket into a statement piece. Here are some stylish options to consider:
Jeweled Buttons: Add some sparkle to your jacket with jeweled buttons. These are great for evening wear and special occasions, instantly elevating your look. Jeweled buttons can be a striking feature on a blazer button .
Embossed Buttons: Buttons with intricate designs or logos can add a touch of uniqueness. These are often found on designer jackets and luxury outerwear, making them a stylish choice for any button coat.
Fabric-Covered Buttons: Matching the button fabric to the jacket fabric creates a cohesive, polished look. These are popular on elegant coats and tailored jackets and are often used for blazer buttons to maintain a sleek appearance.
Functional Button Styles for Jackets
Sometimes, the functionality of the button is just as important as its appearance. Here are some practical options:
Toggle Buttons: Perfect for duffle coats and other winter jackets, toggle buttons are easy to fasten, even with gloves on. They add a touch of charm and are very practical in cold weather, especially for a classic button coat.
Zipper Buttons: Some jackets feature a combination of zippers and buttons for extra security. This is common in outdoor and performance wear, where keeping the elements out is crucial.
Hook and Eye Buttons: These provide a discreet closure that’s often used in formal jackets and blazers. They ensure a clean, uninterrupted line, which is great for sleek, tailored looks.
How to Choose the Right Button Style for Your Jacket
Choosing the right button style for your jacket depends on several factors. Here’s a handy guide to help you decide:
1. Consider the Jacket’s Purpose
Casual vs. Formal: For casual jackets, you might prefer snap buttons or plastic buttons for ease and versatility. For formal jackets like blazers, horn buttons or hook and eye closures might be more appropriate.
Weather Conditions: If you’re looking for a winter jacket, toggle buttons or zipper buttons could be more practical for a button coat.
2. Think About the Fabric
Heavy Fabrics: For materials like wool or leather, metal buttons or leather buttons can provide the necessary support and durability.
Light Fabrics: For lighter fabrics like cotton or polyester, plastic buttons or fabric-covered buttons might be better suited.
3. Match Your Personal Style
Classic Elegance: If you love a timeless look, horn buttons or metal buttons are a great choice for any blazer or jacket.
Modern and Trendy: For a contemporary feel, magnetic buttons or snap buttons are perfect.
Unique and Decorative: If you want to stand out, consider jeweled buttons or embossed buttons.
4. Practicality and Ease of Use
Ease of Fastening: Think about how easy it is to button and unbutton your jacket. Snap buttons and magnetic buttons are user-friendly options.
Durability: Choose buttons that will withstand frequent use, especially if the jacket is for everyday wear.
Conclusion
There you have it! Understanding the different styles of buttons for jacketscan help you make informed choices and elevate your wardrobe. Whether you’re looking for classic elegance, modern functionality, or decorative flair, there’s a button style out there for you. So go ahead, refresh that old jacket or customize a new one with the perfect buttons.
Remember, the right button can make all the difference in the world. It’s a small detail, but it can transform your entire look, whether you’re selecting blazer buttonsor choosing a style for a button coat. So take your time, choose wisely, and let your jacket buttons reflect your unique style and personality.
Shweta, a textile designer with a keen eye and deep knowledge of fabrics, translates her passion into unique designs. She loves to share her expertise and ignite a love for textiles in others. Dive into the world of fabrics with Shweta!
washing instructions for clothes with non-woven interlining
Do you love that sharp, ironed look of a crisp collared shirt? But worried about ruining the special thing inside that keeps it that way? Don’t worry! This guide will teach you how to wash shirts with collar interlining so they stay looking great for a long time.
We’ll delve into different types of interlining fabric, explore washing methods for various fabrics, and provide handy tips for drying and ironing to maintain that perfect collar shape. Whether you’re a seasoned laundry pro or a complete beginner, you’ll find valuable tips to keep your collared shirts looking sharp, wash after wash.
So, grab your favorite shirt with a collar (or that stack that’s been piling up!), and get ready to do laundry with no worries!
Table of Content
Understanding Collar Interlining
Washing Methods for Different Fabrics
Drying and Ironing for a Flawless Finish
Bonus Tips for Long-Lasting Collars
Conclusion
Understanding Collar Interlining
The thing that makes a collared shirt look sharp and keeps its shape is a hidden layer called collar interlining. This is like a thin piece of stabilizer that’s stuck onto the back of the collar. It can be made from different materials, like glue , woven fabric, or felt-like material .
Here are some common types of collar interliningto be aware of:
Fusible Interlining: This type has a heat-activated adhesive backing that allows it to be ironed directly onto the fabric. It’s a convenient option for manufacturers and offers good stability.
Woven Interlining: Made from woven fibers like cotton or polyester, this type offers a strong and stable foundation for collars. It’s often used in high-quality dress shirts. Often referred to as woven interlining fabric.
Non-Woven Interlining: This type is made from bonded fibers and is not as stiff as woven interlining. It’s a good option for shirts that need a bit of shape without a lot of bulk. We can also call this non woven interlining fabric.
Knowing the type of interlining in garments (woven, non-woven, or fusible) in your shirt can help you determine the best washing method.
Washing Methods for Different Fabrics
Now that you know about the special lining inside your shirt collar that helps it keep its shape, let’s learn how to wash shirts made from different fabrics so both the fabric and the lining last a long time.
Cotton and Cotton Blends
Cotton and cotton blends are popular choices for collared shirts due to their breathability, comfort, and durability. Here’s how to care for them:
Reading the Label: Always check the label on your shirt first, as it might provide specific washing instructions related to the lining and interlining fabric.
Machine Washing: Generally, cotton and cotton blend shirts can be machine-washed in warm or cold water on a gentle cycle.
Detergent: Use a mild laundry detergent suitable for colors or delicates, depending on the shirt’s color. Avoid harsh detergents that can damage the fabric or interlining.
Fasteners: Close all buttons and zippers before washing to prevent snags or tears.
Linen
Linen shirts offer a cool, luxurious feel, but require a bit more attention during washing to protect the interlining:
Gentle Cycle or Handwashing: Opt for a gentle machine wash cycle with cold water or hand wash your linen shirt in cool water with a mild detergent.
Minimize Spinning: Excessive spinning can wrinkle linen easily. If machine washing, choose a low spin speed or hand-writing gently.
Air Drying is Best: Avoid tumble drying as it can shrink and damage linen. Hang your shirt to air dry in a cool, shaded area. This drying method is especially important for shirts with non-woven fusible interlining, as the heat from a dryer can damage the adhesive properties.
Handwashing or Delicate Cycle: For silk shirts, handwashing is highly recommended. For synthetics, you can use a delicate cycle on your washing machine with cold water.
Mild Detergent: Use a gentle detergent specifically formulated for delicates to avoid weakening the fibers or the adhesive in fusible interlining.
Skip the Dryer: Never put silk or synthetic shirts in the dryer. Hang them to air dry in a cool, well-ventilated area. This will help prevent the heat from damaging the fabric and the interlining.
Drying and Ironing for a Perfect Finish
Once your collared shirt is clean, the drying and ironing process plays a crucial role in maintaining a crisp collar and overall sharp look, especially for shirts with a woven interlining fabric that needs heat to set its shape:
Air Drying for a Gentle Touch
Air drying is the most gentle way to dry your collared shirts, especially those made from linen or delicate fabrics with non-woven interlining fabric. Here’s how:
Reshape the Collar: While the shirt is still damp, gently reshape the collar by hand to ensure it dries in the correct form, especially if the shirt has a woven interlining that needs to be molded while damp.
Hang Properly: Use a sturdy hanger that fits the shirt’s shoulders to prevent stretching or sagging. Hang the shirt in a well-ventilated area away from direct sunlight.
Ironing Essentials for a Crisp Collar
Imagine achieving a perfectly crisp collar, especially for shirts with a woven interlining fabric that responds well to heat:
Iron Settings: Always check the care label for recommended ironing temperature settings for your specific fabric. Using the wrong heat setting can damage the fabric or the interlining.
Start Inside the Collar: Begin ironing on the inside of the collar to avoid leaving any iron marks on the outer fabric, especially for shirts with a delicate outer fabric but a woven fusible interlining that needs heat to activate the adhesive.
Work Your Way Out: After ironing the inside of the collar, iron the rest of the shirt using smooth strokes, following the seams and avoiding the buttons. Be mindful of the heat setting to avoid damaging the interlining, especially for shirts with non-woven interlining that doesn’t need high heat.
Bonus Tips for Long-Lasting Collars
By following these additional tips, you can extend the life of your collared shirts and keep their collars looking sharp for longer, regardless of the type of interlining fabric used:
Pre-Treating Stains for a Flawless Finish
Act Quickly: The sooner you pretreat a stain, the easier it will be to remove. Identify the type of stain and use an appropriate stain remover according to the care label instructions. This will help prevent the stain from setting and potentially weakening the non woven interlining fabric or woven interlining fabric.
Spot Cleaning: For minor stains, try spot cleaning the area with a gentle stain remover before washing. This will help prevent the stain from spreading and potentially damaging the interlining, especially for shirts with woven interlining fabric that might absorb the stain more readily.
Storing Your Shirts Properly
Folding or Hanging: You can choose to fold or hang your collared shirts for storage. Folding is a space-saving option, but hanging helps maintain the collar shape, especially for shirts with a woven interlining that needs support to retain its form.
Use Wide Hangers: Use wide, sturdy hangers that fit the shoulders of your shirt to prevent stretching or sagging. This is important for all shirts, but especially for those with a woven interlining fabric that can lose its shape if stretched.
Button Up: Buttoning up the shirt before hanging helps maintain its shape and prevents wrinkles, particularly for shirts with a non-woven interlining that might not provide as much structural support.
Store in a Cool, Dry Place: Avoid storing your shirts in damp or humid environments, as this can encourage mildew growth and wrinkles. This is important for all fabrics, but especially for shirts with non-woven fusing interlining as moisture can weaken the adhesive properties.
Conclusion
Washing shirts with collar interlining doesn’t have to be a mystery. By understanding the different interlining types (woven Interlining, non-woven Interlining, fusible Interlining), tailoring your washing method to the fabric, and following these handy drying and ironing tips, you can ensure your collared shirts stay looking sharp, crisp, and ready to make a great impression for years to come.
Shweta, a textile designer with a keen eye and deep knowledge of fabrics, translates her passion into unique designs. She loves to share her expertise and ignite a love for textiles in others. Dive into the world of fabrics with Shweta!
Fusing Interlining Without An Iron: Creative Interlining Techniques
Hey there, sewing fans! Ever been stuck on a project, needing to attach special fabric (interlining fabric) to make it look neat and drape nicely, but then realize you don’t have an iron? Don’t worry! This guide will show you how to attach stiffening fabric to your project without needing an iron.
Table of Content
Understanding Interlining and Why We Fuse It?
Iron-Free Interlining Fusion Techniques
Choosing the Right Technique for Your Project
Bonus Tips for Flawless Interlining Fusion
Conclusion
Understanding Interlining and Why We Fuse It
Interlining is a magical fabric that provides structure, stability, and a touch of shape to your project. It prevents your fabric from sagging, helps collars and cuffs maintain their crispness with collar interlining, and even adds a touch of weight for a more luxurious feel.
Traditionally, we fuse interlining using heat – that’s where the iron comes in. But what if you don’t have one, or maybe you’re working with a heat-sensitive fabric? No worries! We’ve got some alternative techniques up our sleeves
Iron-Free Interlining Fusion Techniques
Now that we’re ready to use our sewing skills, let’s explore some creative ways to fuse stiff interfacing without an iron. Here are some effective methods, each with its pros and cons for different situations:
The Power of Double-Sided Tape:
This sticky tape you can find anywhere is a great way to attach different kinds of interfacing to your fabric, like the kind that’s woven or nonwoven.
Prep: Cut your interlining fabric to the desired size and ensure your fabric is clean and dust-free.
Application: Apply thin strips of double-sided tape along the edges of the interlining, leaving a small gap between the strips. For larger areas, create a grid pattern with the tape.
Bonding: Carefully place the interlining onto the wrong side of your fabric, aligning the edges precisely. Press down firmly to ensure a good bond, especially between the fabric and the gaps in the tape grid.
Pros: Easy to find, readily available, good for small to medium-sized projects.
Cons: Not ideal for large areas as the tape might not provide enough hold. Might leave residue on delicate fabrics.
2. Stitch Witchery to the Rescue:
This double-sided fusible web is a popular choice for sewists working with interlining fabrics. Here’s how to use it:
Prep: Cut your interlining and Stitch Witchery to the same size.
Application: Place the Stitch Witchery between the wrong side of your fabric and the interlining, with the sticky sides facing outwards.
Bonding: Following the manufacturer’s instructions, use a heat source like a hairdryer on low heat to activate the adhesive. Gently move the hairdryer in a circular motion, applying even pressure until the interlining and fabric are securely fused.
Pros: Easy to use, strong bond, good for intricate shapes.
Cons: Requires a heat source (hairdryer), might not be suitable for all fabrics .
3. Wonder Web: A Weaver of Fabric Bonds:
Similar to Stitch Witchery, Wonder Web offers a fusible web solution for fusing interlining. Here’s the process:
Prep: Cut your interlining and Wonder Web to the same size. Ensure your fabric is clean and ironed (if possible) to remove any wrinkles.
Application: Following the Wonder Web instructions, place the web between the fabric and interlining with the rough sides facing outwards.
Bonding: Iron on low heat (if possible) according to the Wonder Web instructions. Alternatively, use a damp cloth and a heavy object (like a stack of books) to press firmly for several minutes, activating the adhesive.
Pros: Strong bond, good for curved edges and intricate shapes.
Cons: Might require low-heat ironing, check Wonder Web compatibility with your fabric. Pressing with a damp cloth requires more effort and time.
4. Get Rolling with Heat Activation Tape:
This specialized tape offers a strong bond activated by heat, but not necessarily from an iron. Here’s how to use it for fusing interlining fabrics:
Prep: Cut your interlining and heat activation tape to the desired size. Ensure your fabric is clean and dust-free.
Application: Following the tape’s instructions, apply thin strips of heat activation tape along the edges of the interlining, leaving a small gap between the strips. For larger areas, create a grid pattern.
Bonding: Use a heat source like a hairdryer on its highest heat setting (check the tape’s instructions for specific temperature recommendations). Move the hairdryer in a circular motion, applying even heat until the tape activates and the interlining securely bonds with the fabric.
Pros: Strong bond, good for larger areas, allows for precise placement.
Cons: Requires a heat source with adjustable temperature control, might not be readily available in all sewing stores.
Prep: Cut your interlining to the desired size. Ensure your fabric is clean and dust-free.
Application: Apply a thin, even layer of fabric glue to the wrong side of your fabric. Less is more here!
Bonding: Carefully place the interlining onto the fabric with the glue, aligning the edges precisely. Press down firmly for several minutes to ensure a good bond. For larger areas, work in sections to avoid the glue drying before you can position the interlining.
Pros: Strong, permanent bond, good for small and intricate shapes.
Cons: Requires meticulous application to avoid glue stains, might not be suitable for delicate fabrics.
Now that you’re armed with a toolbox of iron-free fusion techniques for various interlining types, let’s explore how to choose the best method for your project:
Project Size: Double-sided tape and fabric glue work well for small to medium-sized projects. For larger areas with interlining fabrics, consider heat activation tape or Stitch Witchery if you can manage a low-heat iron application.
Fabric Type: Delicate fabrics might not handle the heat from a hairdryer or require special fabric glue. Opt for double-sided tape or parchment paper and pressure for these delicate materials.
Interlining Type: Check the manufacturer’s instructions for your specific interfacing. Some might be compatible with the parchment paper and pressure technique, while others might require a low-heat iron for Wonder Web activation.
Desired Bond Strength: Double-sided tape and Stitch Witchery offer a good bond for lighter fabrics and less structural applications. Fabric glue and heat activation tape provide a stronger, more permanent bond for heavier fabrics and projects requiring extra stability, like collars needing collar interlining .
Conclusion
There you have it! With these alternative techniques and handy tips, you can confidently fuse your Interlining fabrics , even without an iron. Remember, a little creativity and resourcefulness can go a long way in the world of sewing. So, grab your Interlining fabrics , interfacing (woven Interlining or non-woven Interlining , fusible Interlining , collar interlining or sew-in), and get ready to create something amazing – iron-free and fearless!
Shweta, a textile designer with a keen eye and deep knowledge of fabrics, translates her passion into unique designs. She loves to share her expertise and ignite a love for textiles in others. Dive into the world of fabrics with Shweta!