Categories
Woven Interlinings

Master the Two-Button Suit: Button Up Your Style with Confidence

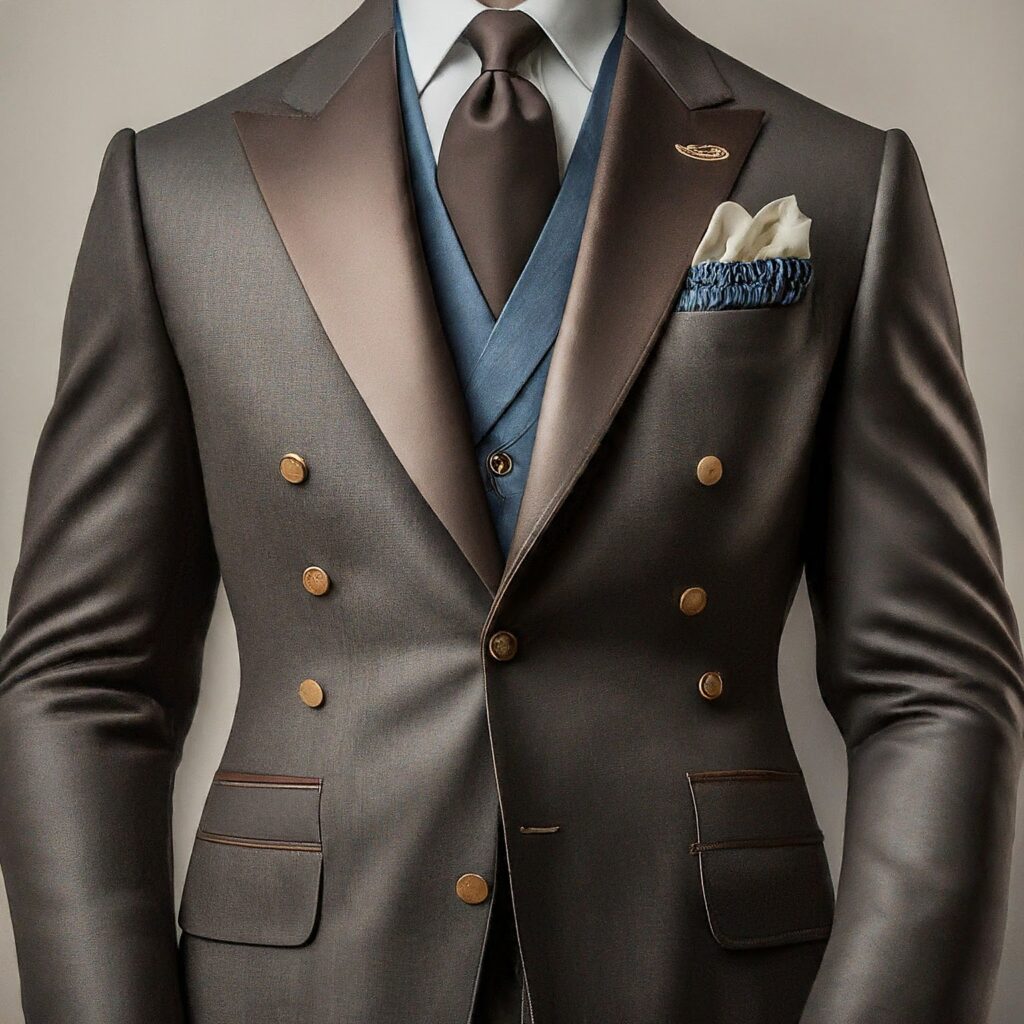
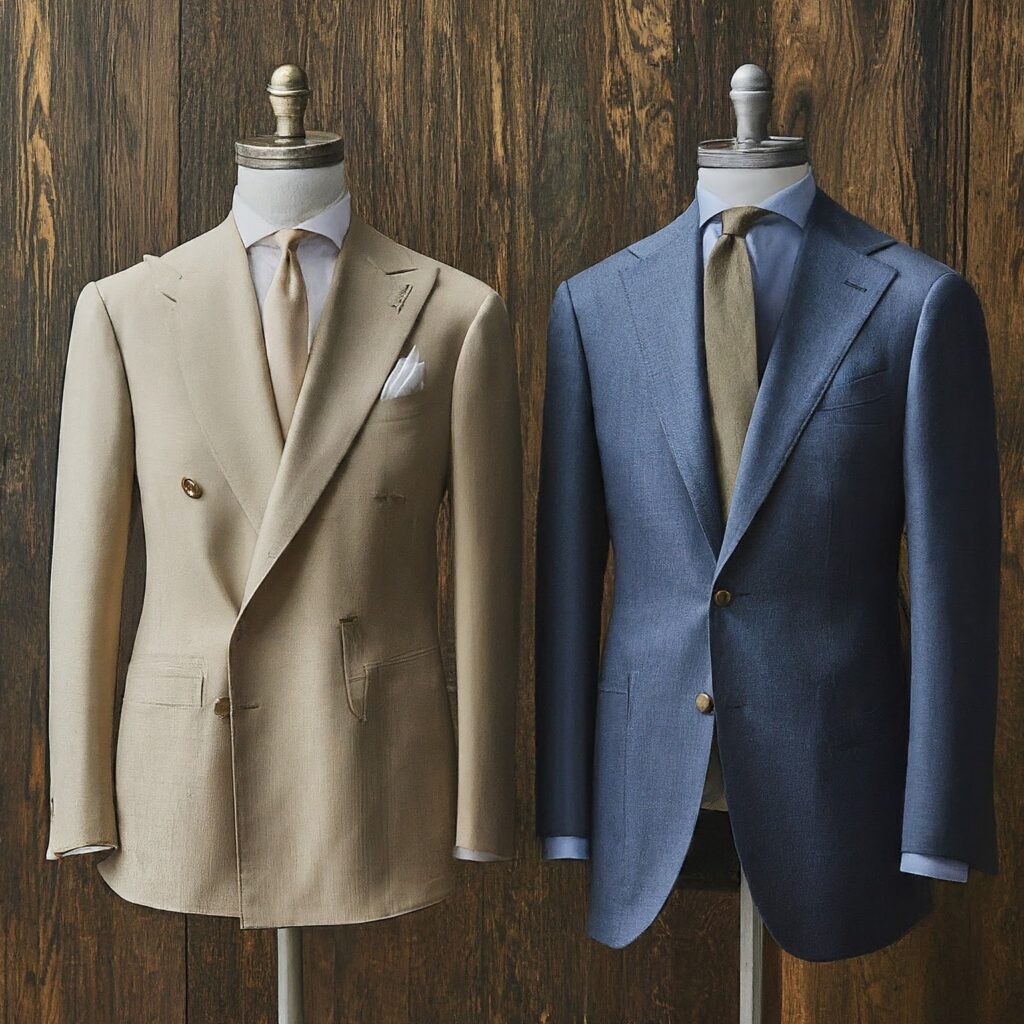
The two-button suit jacket – a timeless classic that exudes sophistication and style. But have you ever gotten confused about how to button it properly? Fear not, this guide will help you, specifically focusing on the ever-important “buttoning rule” for blazer buttons, coat buttons, or jacket buttons, as they’re all interchangeable terms.

Table of Content

  • The Two-Button Suit
  • Button Up or Down?
  • Advanced Two-Button Suit Buttoning Tips
  • The History of the Two-Button Suit Jacket
  • Two-Button Suit vs. Three-Button Suit
  • Button Up with Confidence

The Two-Button Suit

The two-button suit jacket offers a sleek and versatile silhouette that flatters a wide range of body types. It sits comfortably between the more formal three-button suit and the more relaxed single-button option. Here’s what makes the two-button suit a wardrobe staple:

  • Versatility: Two-button suits can be dressed up or down depending on the occasion. Pair it with dress pants and a tie for a formal event, or rock it with chinos and a button-down shirt for a more casual look.
  • Flattering Silhouette: The two-button placement creates a visually elongated torso, making it a great choice for both taller and shorter gentlemen.
  • Modern Appeal: The two-button suit offers a clean and contemporary aesthetic, perfect for the modern man who wants to look sharp without feeling overly formal.

Button Up or Down? 

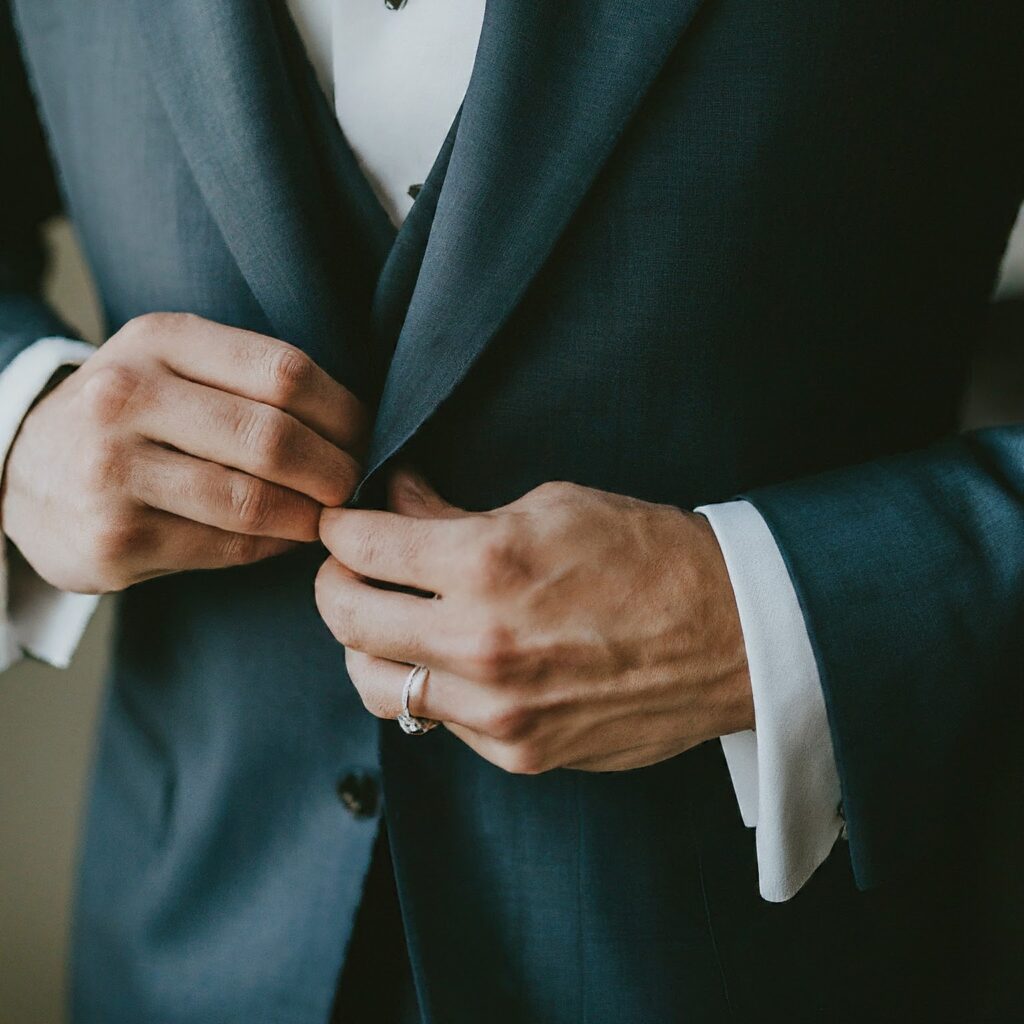
The golden rule of the two-button suit is to button the top button, and leave the bottom one unbuttoned. This creates a clean and balanced look that flatters the silhouette. Here’s why this rule exists for blazer buttons, coat buttons, and jacket buttons:

  • Function and Form: Two-button suits are designed with this specific buttoning rule in mind. Buttoning both blazer buttons (or coat buttons/jacket buttons) can restrict movement and create an unflattering bunching effect at the waist.
  • Historical Context: The two-button suit originated in the early 20th century, a time when a more relaxed and comfortable silhouette became popular. Leaving the bottom button undone became the norm as it reflected this shift in style for blazers, coats, and jackets.

Advanced Two-Button Suit Buttoning Tips

While the one-button-up rule is the foundation for blazer buttons (or coat buttons/jacket buttons), there are some additional tips to consider:

  • Sitting Down: When you sit down, it’s perfectly acceptable to unbutton the top button on your blazer (or coat/jacket) to avoid any pulling or strain on the fabric. Just remember to button it back up when you stand.
  • Body Type: If you have a shorter torso, consider experimenting with buttoning both buttons on your blazer (or coat/jacket) occasionally. This can visually elongate your torso and create a more balanced look. However, always ensure it doesn’t create any tightness or discomfort.
  • Matching Your Style: The two-button suit rule is a guideline, not a rigid law for blazer buttons (or coat buttons/jacket buttons). If you have a very specific and bold style, you can experiment with buttoning both buttons for a more dramatic look.

The History of the Two-Button Suit Jacket

The two-button suit jacket emerged in the early 20th century as a reaction to the more formal and restrictive styles of the previous era. Men started favoring a more relaxed and comfortable silhouette, and the two-button jacket became a popular choice for blazers, coats, and jackets.

Throughout the decades, the two-button suit has seen various interpretations. From the wide lapels of the 1930s to the slimmer cuts of the modern era, it has continuously adapted to changing fashion trends. However, the core principle of buttoning the top button and leaving the bottom one undone has remained a constant for blazer buttons, coat buttons, and jacket buttons.

Two-Button Suit vs. Three-Button Suit

Both two-button and three-button suits are classic choices, but they offer slightly different vibes for blazers, coats, and jackets. Here’s a breakdown to help you decide:

  • Two-Button Suit:
    • Offers a more modern and relaxed feel.
    • It’s a versatile option for various occasions and flatters a wide range of body types.
    • The two-button blazer (or coat/jacket) is a great choice for a clean and contemporary look.
  • Three-Button Suit:
    • Exudes a more formal and traditional aesthetic.
    • It might be a better choice for very formal events or for men with a longer torso, especially for three-button blazers or coats.
    • Three-button jackets can sometimes appear a bit too structured for casual settings.

Ultimately, the best choice depends on your personal style and the occasion. If you’re unsure, the two-button suit (or blazer/coat/jacket) is always a safe bet due to its versatility.

Button Up with Confidence

The two-button suit jacket is a timeless wardrobe essential that offers both style and versatility. By mastering the buttoning rule for blazer buttons (or coat buttons/jacket buttons) and understanding the history and nuances of this classic garment, you can confidently rock your two-button suit for any occasion.

  • Confidence is Key: The most important factor is to wear your two-button suit (or blazer/coat/jacket) with confidence. When you feel good in what you’re wearing, it shows!
  • Accessorize Wisely: Elevate your two-button suit with the right accessories. A well-chosen tie, pocket square, or belt can add personality and polish to your look, especially for blazers and coats.
  • Take Care of Your Suit: A well-tailored and well-maintained two-button suit (or blazer/coat/jacket) will last you for years to come. Invest in proper cleaning and storage to keep it looking its best.

So, the next time you reach for a suit blazer button (or coat button/jacket button), consider the timeless appeal of the two-button option. With the knowledge and confidence gained from this guide.

Link of related Articles

shweta-textile-designer
Shweta, a textile designer with a keen eye and deep knowledge of fabrics, translates her passion into unique designs. She loves to share her expertise and ignite a love for textiles in others. Dive into the world of fabrics with Shweta!

Categories
Woven Interlinings

Metal vs. Plastic Blazer Buttons

We all know a well-fitting blazer can elevate any outfit, but have you ever stopped to consider the power of the buttons? Believe it or not, blazer buttons (also called coat buttons or jacket buttons) can make a huge difference! Today, we’re diving deep into the world of metal vs. plastic blazer buttons, helping you choose the perfect finishing touch for your next statement piece.

Table of Content

  • Metal Blazer Buttons
  • Plastic Blazer Buttons
  • Metal vs. Plastic Blazer Buttons
  • Choosing the Right Blazer Buttons for You
  • Exploring Other Button Options
  • Conclusion

Metal Blazer Button

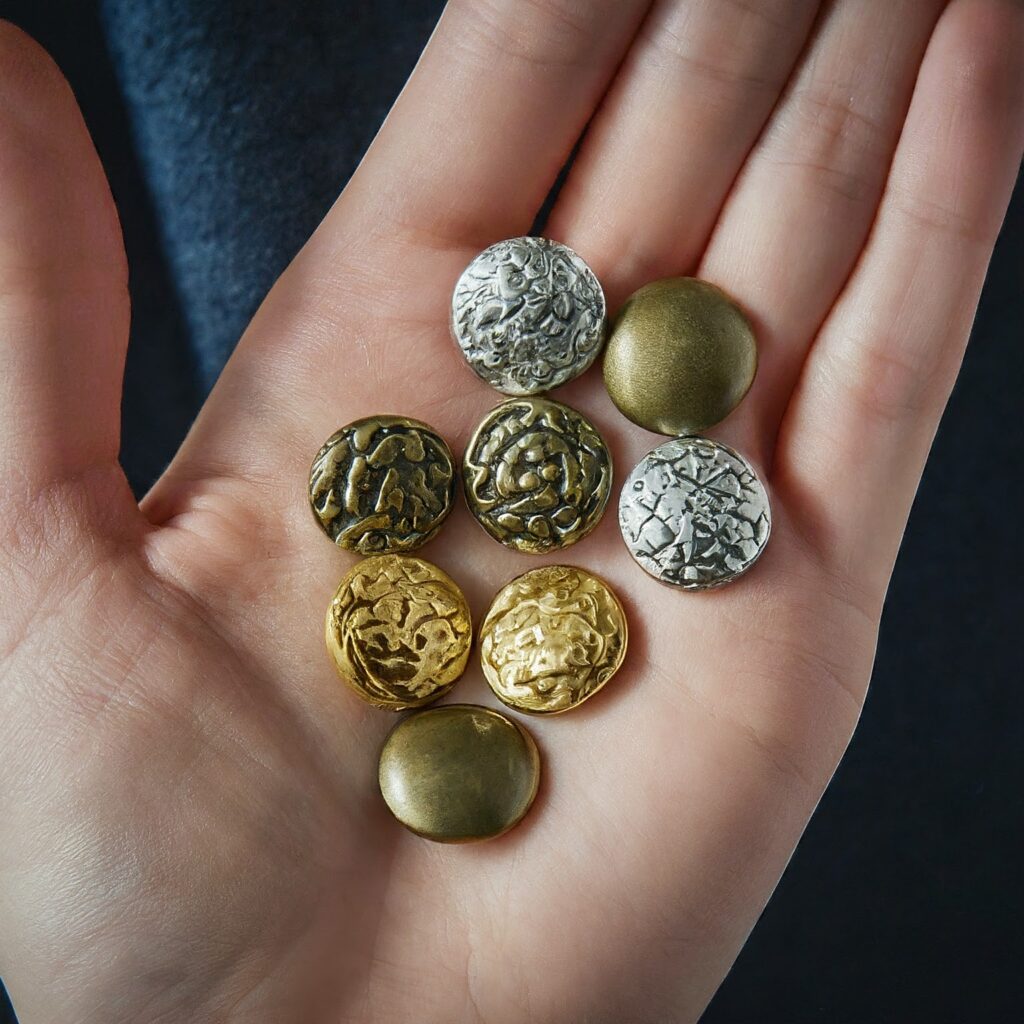
Metal buttons have graced blazers for decades, offering a timeless and sophisticated look. They come in various finishes like gold, silver, gunmetal, and even antique brass, adding a touch of luxury and weight to your garment. Here’s what makes them stand out:

  • Durability: Metal buttons are generally more durable than their plastic counterparts. They’re less prone to chipping or breaking, making them a great choice for blazers you plan to wear often.
  • Versatility: Metal buttons come in a wide range of styles, from sleek and minimalist to ornate and eye-catching. This allows you to find the perfect match for both classic and trendy blazers.
  • Style: Metal buttons often exude a sense of sophistication and formality. They can elevate a simple blazer into a more polished and put-together piece.

Plastic Blazer Buttons

While metal buttons have a long history, plastic buttons offer a more modern and playful alternative. They’re available in a vast array of colors, finishes, and textures, allowing you to add a pop of personality to your outfit. Here’s why plastic buttons might be the answer:

  • Versatility: Plastic buttons come in an endless variety of styles and colors. You can find everything from classic black or navy to vibrant neons or fun patterns. This opens up a world of possibilities for customizing your blazer.
  • Lightweight: Plastic buttons are lighter than metal ones, which can be beneficial for certain fabrics or styles. They won’t weigh down your blazer and might be a better choice for a more casual look.
  • Cost: Plastic buttons are generally more affordable than metal buttons. This can be a great option if you’re on a budget or want to experiment with different looks without breaking the bank.

Metal vs. Plastic Blazer Button

let’s compare them across key factors:

FactorMetal ButtonsPlastic Buttons
DurabilityHighModerate
VersatilityHigh (styles), Limited (colors)High (colors/styles)
StyleClassic, sophisticated, formalModern, playful, casual
MaintenanceMay require polishingEasy to clean
CostGenerally higherGenerally lower

Choosing the Right Blazer Buttons for You

The perfect blazer button choice depends on several factors:

  • Blazer Style: Metal buttons complement traditional styles, while plastic buttons can add a fun touch to contemporary blazers.
  • Fabric: Heavyweight fabrics like wool might benefit from the weight and structure of metal buttons. For lighter fabrics like linen, plastic buttons can be a good option.
  • Occasion: Are you dressing for a formal event or a casual outing? Metal buttons often add a touch of formality, while plastic buttons can be more versatile for various occasions.
  • Personal Style: Ultimately, the best button choice reflects your personal style. 

Beyond Metal and Plastic

While metal and plastic are the most common choices, there are other materials to consider:

  • Natural materials like horn, wood, or shell offer a unique and luxurious look.
  • Fabric-covered buttons can add a touch of texture and coordinate with your blazer fabric.
  • Enamel buttons come in vibrant colors and intricate designs, perfect for a statement piece.

Conclusion

Don’t underestimate the power of buttons! Choosing the right ones can elevate your blazer from ordinary to extraordinary. By considering the factors mentioned above, you can confidently select metal, plastic, or even another alternative to create a blazer that reflects your unique style and makes you feel confident and ready to take on

Link of related Articles

shweta-textile-designer
Shweta, a textile designer with a keen eye and deep knowledge of fabrics, translates her passion into unique designs. She loves to share her expertise and ignite a love for textiles in others. Dive into the world of fabrics with Shweta!

Categories
Woven Interlinings

The Ultimate Guide to Choosing Interlining for Your Bodice

Ever dreamt of crafting a garment with a bodice that boasts sharp lines, defined curves, and a touch of supportive magic? The secret weapon in your arsenal is interlining fabric.

But with so many interlining options available, choosing the right one for your structured bodice project can feel overwhelming. Don’t worry, I’m here to guide you through the selection process! In this article, we’ll explore the interlining fabrics, and their properties, and help you pick the perfect match for your dream bodice.

Table of Content

  • What is Interlining Fabric and Why Use it for Bodices?
  • Types of Interlining Fabric for Structured Bodices
  • Choosing the Right Interlining Fabric for Your Bodice Project:
  • Tips for Using Interlining Fabric in Your Bodice Project
  • Conclusion

What is Interlining Fabric and Why Use it for Bodices?

Interlining is a sheet-like material that comes in various weights and types, designed to enhance the shape and stability of your garments, specifically for interlining in garments like bodices.

So, why is interlining so important for structured bodices? Here are some reasons:

  • Structured Silhouette: Interlining provides the backbone for maintaining a defined shape in your bodice. It prevents unwanted sagging or drooping, especially in areas like sweetheart necklines, fitted waistlines, and structured seams.
  • Crisp Lines and Edges: Adding interlining creates crisp and polished edges, giving your bodice that professional, tailored look.
  • Improved Drape: The right interlining can actually enhance the drape of your bodice fabric by adding a touch of weight and fullness. This can create a flattering silhouette and smooth out any unwanted wrinkles.
  • Enhanced Durability: Interlining reinforces your fabric, making your bodice more resistant to wear and tear. This is particularly important for garments you plan to wear often.

Types of Interlining Fabric for Structured Bodices

Now that you know the benefits, let’s explore the different types of interlining fabrics available:

Woven Interlining Fabrics:

  • Made from natural fibers like cotton or synthetic fibers like polyester.
  • Offer a range of weights from lightweight to heavyweight.
  • Provides excellent structure and stability, perfect for creating tailored looks.
  • Can be more challenging to work with for beginners due to its directional grain.

Non-Woven Interlining Fabrics:

  • Made from bonded fibers, offering a sheet-like construction with no grain.
  • Comes in various weights and types, with options for sew-in or fusible interlining application.
  • Easier to work with for beginners due to its flexibility and lack of grain.
  • Offers good to excellent structure depending on the weight and type chosen.

Fusible vs. Sew-in Interlining:

  • Fusible Interlining: Has a heat-activated adhesive backing that allows you to iron it directly onto your fabric. This is a quick and easy option for beginners or projects with simple shapes.
  • Sew-in Interlining: Requires stitching it to your fabric for a permanent bond. Offers more flexibility for intricate shapes and allows for precise placement. This is a good choice for experienced sewers or projects requiring more control.

Choosing the Right Interlining Fabric for Your Bodice Project
Selecting the perfect interlining for your structured bodice project depends on several factors:

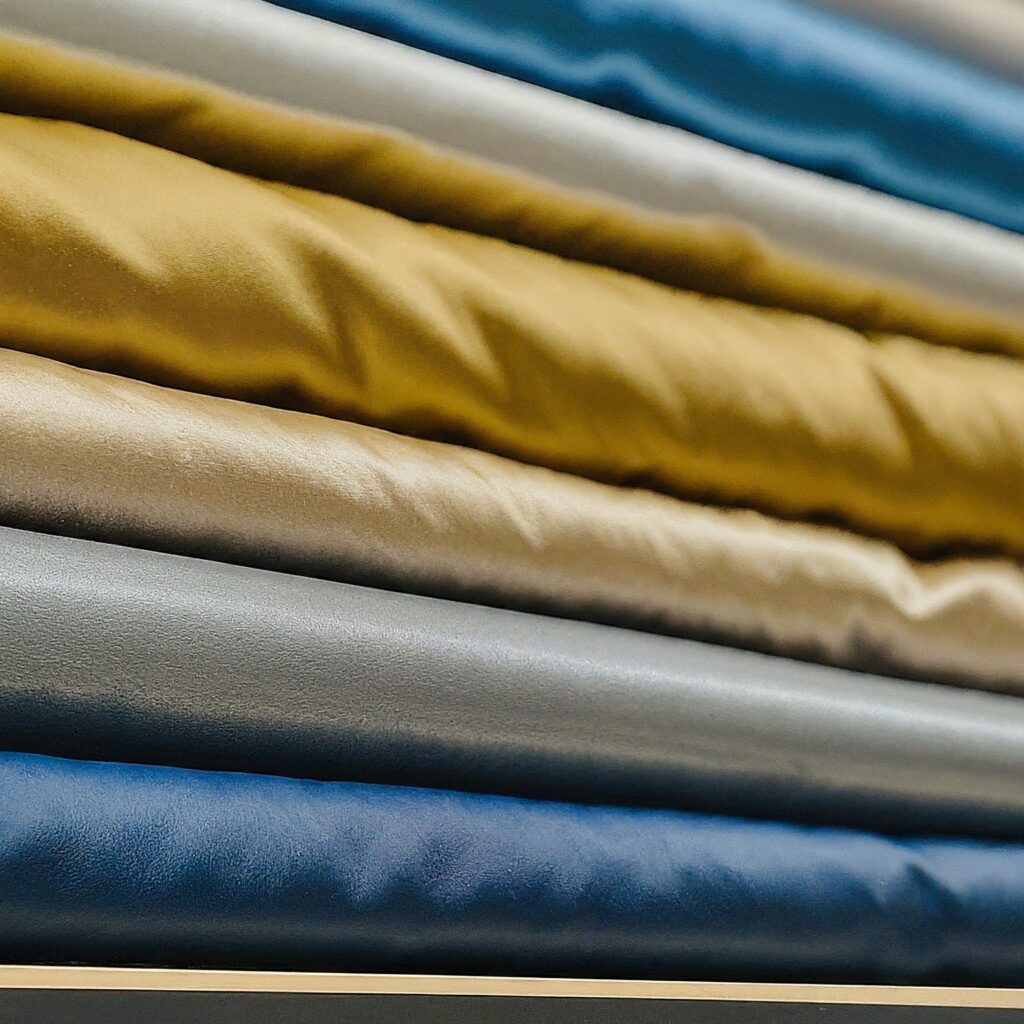
  • Fabric Weight and Drape:Lightweight Fabrics (chiffon, voile): Opt for a lightweight, non-woven interlining to maintain a soft drape.
    • Medium Weight Fabrics (cotton, linen): A mediumweight, woven or non-woven interlining offers good structure for tailored bodices.
    • Heavyweight Fabrics (wool): Heavyweight, woven interlining provides the most support for structured bodices in heavier fabrics.
  • Bodice Style and Desired Structure:
    • Simple Bodice (sweetheart neckline): A lightweight to medium weight interlining can provide enough structure for crisp edges.
    • Structured Bodice (bustier, corset): A heavyweight, woven interlining is ideal for achieving a defined and supportive bodice.
  • Sewing Skill Level and Project Complexity:
    • Beginner: Fusible interlining is a user-friendly option for simple bodices. Its ease of application makes it a great choice for those starting their interfacing journey.
    • Experienced Sewer: Sew-in interlining offers more control and is suitable for complex bodice shapes with intricate details. It allows for precise placement and fine-tuning of the structure.

Tips for Using Interlining Fabric in Your Bodice Project
The perfect interlining for your structured bodice, here are some helpful tips for using it effectively:

  • Pre-Wash Your Fabric : If your bodice fabric is washable and you plan to wash the finished garment, pre-wash and dry it according to the fabric care instructions. This prevents the fabric from shrinking after attaching the interlining.
  • Test the Interlining on a Scrap: Before using the interlining on your main fabric, test a small piece on a scrap of your bodice fabric. This allows you to check the adhesion (for fusible interlining) and ensure the interfacing (another term for interlining) doesn’t cause any puckering or distortion.
  • Mark Your Bodice Pieces: Clearly mark darts, seams, and other bodice markings on both the fabric and interlining pieces before attaching them. This ensures everything lines up perfectly.
  • Attaching Interlining:
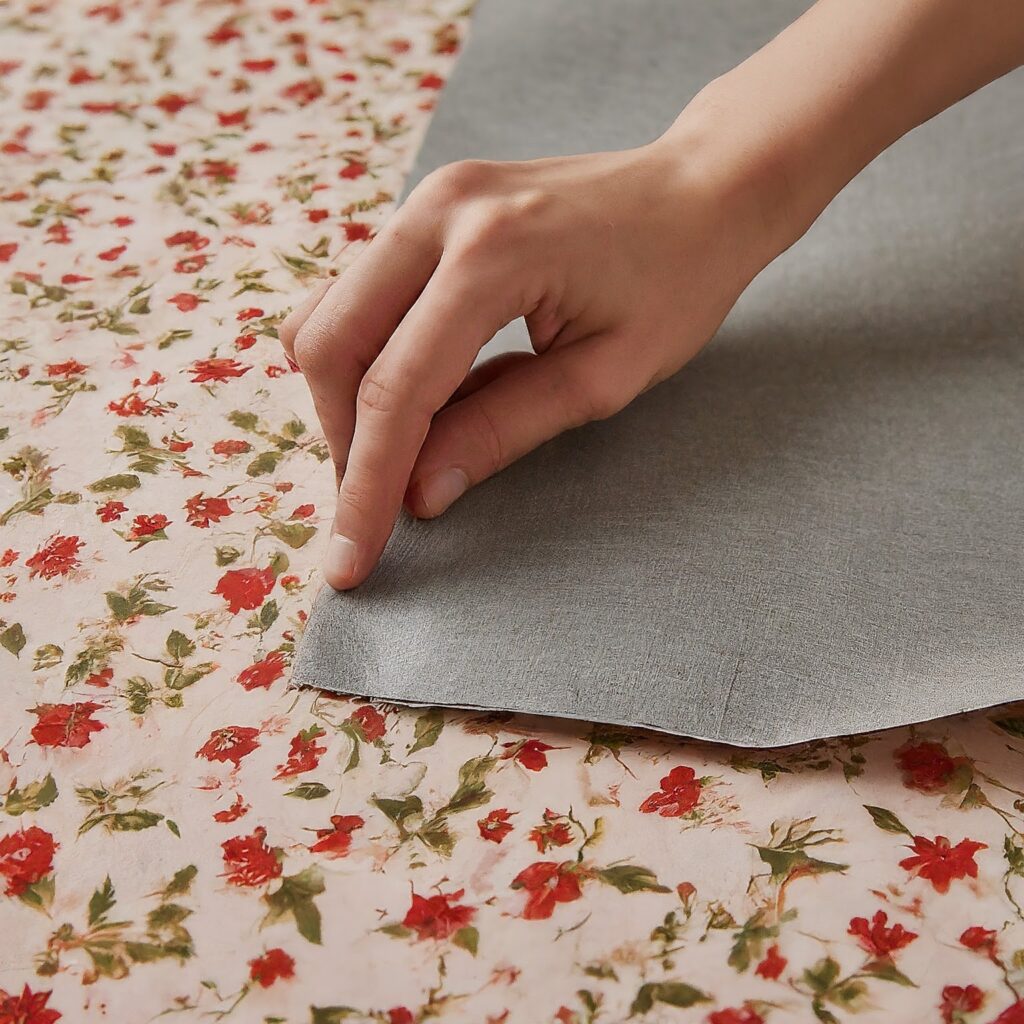
    • Fusible Interlining: Follow the manufacturer’s instructions for heat setting and application pressure. Use a pressing cloth for added protection against scorching your fabric.
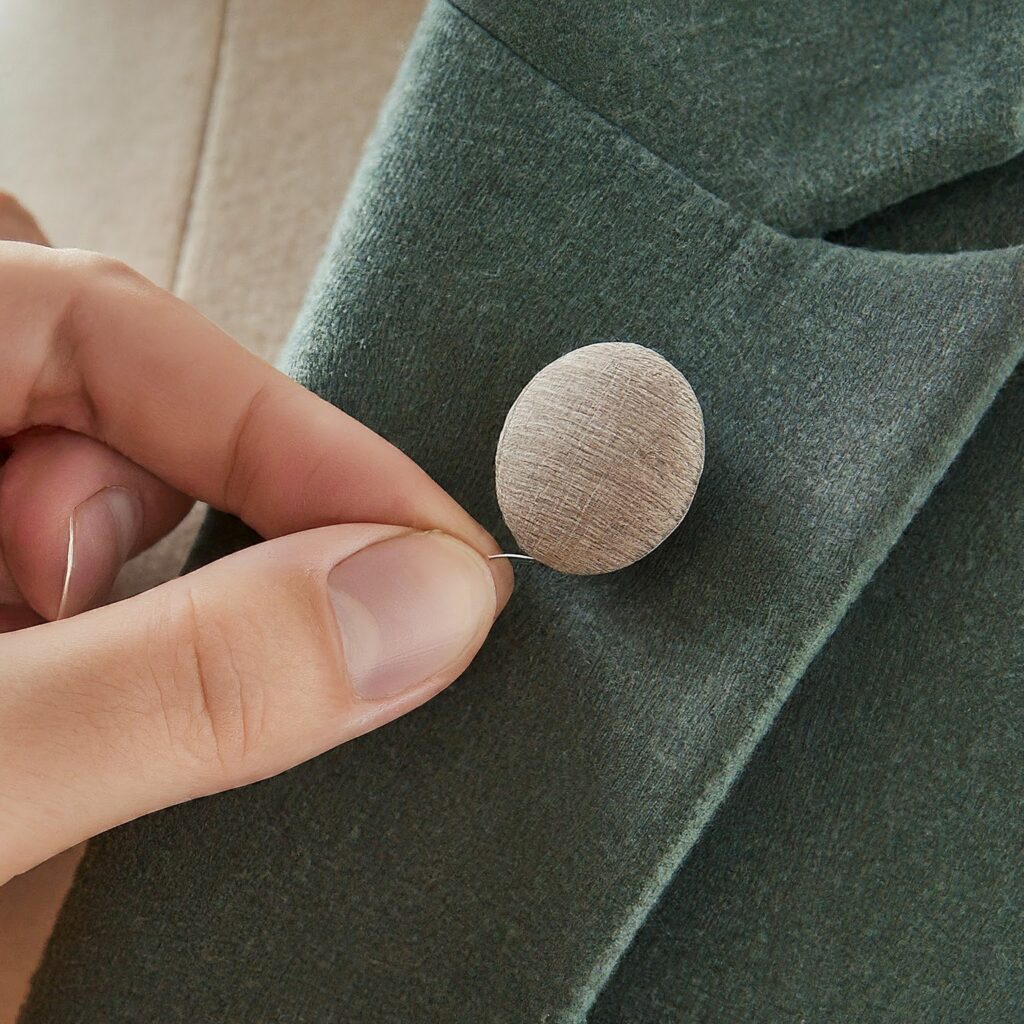
    • Sew-in Interlining: Pin the interlining to the wrong side of your bodice fabric, ensuring it lies flat and wrinkle-free. Sew around the perimeter of the interlining within your seam allowance using a straight stitch and a thread color that blends well with both fabrics. Trim any excess interlining close to the stitching line.
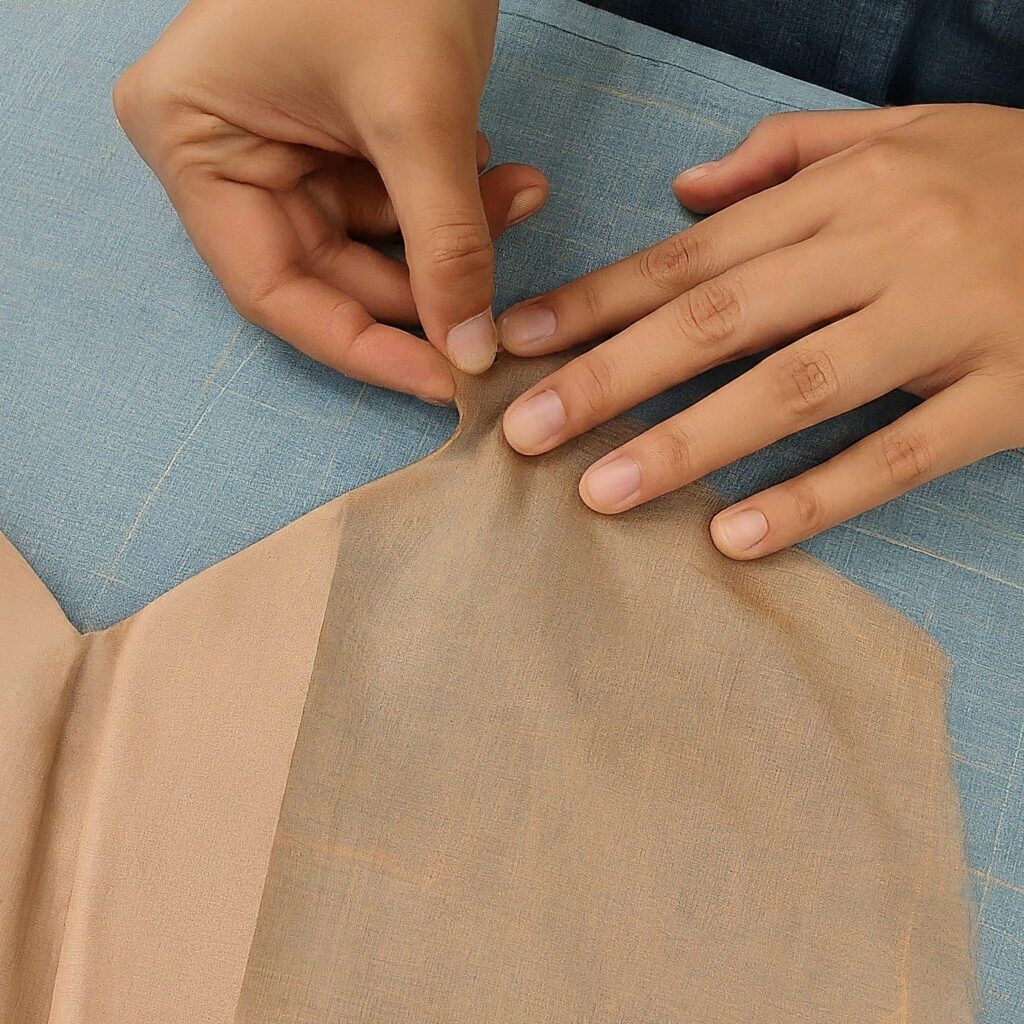
  • Clipping Curves: Carefully clip the curves of your interfacing piece to prevent bulk in your seams, especially around areas like darts and curved bodices. This helps the fabric drape smoothly over the structured areas.
  • Finishing Touches: Once the interlining is attached, press your bodice pieces according to your fabric’s care instructions. This helps the interlining and fabric bond seamlessly.
Conclusion

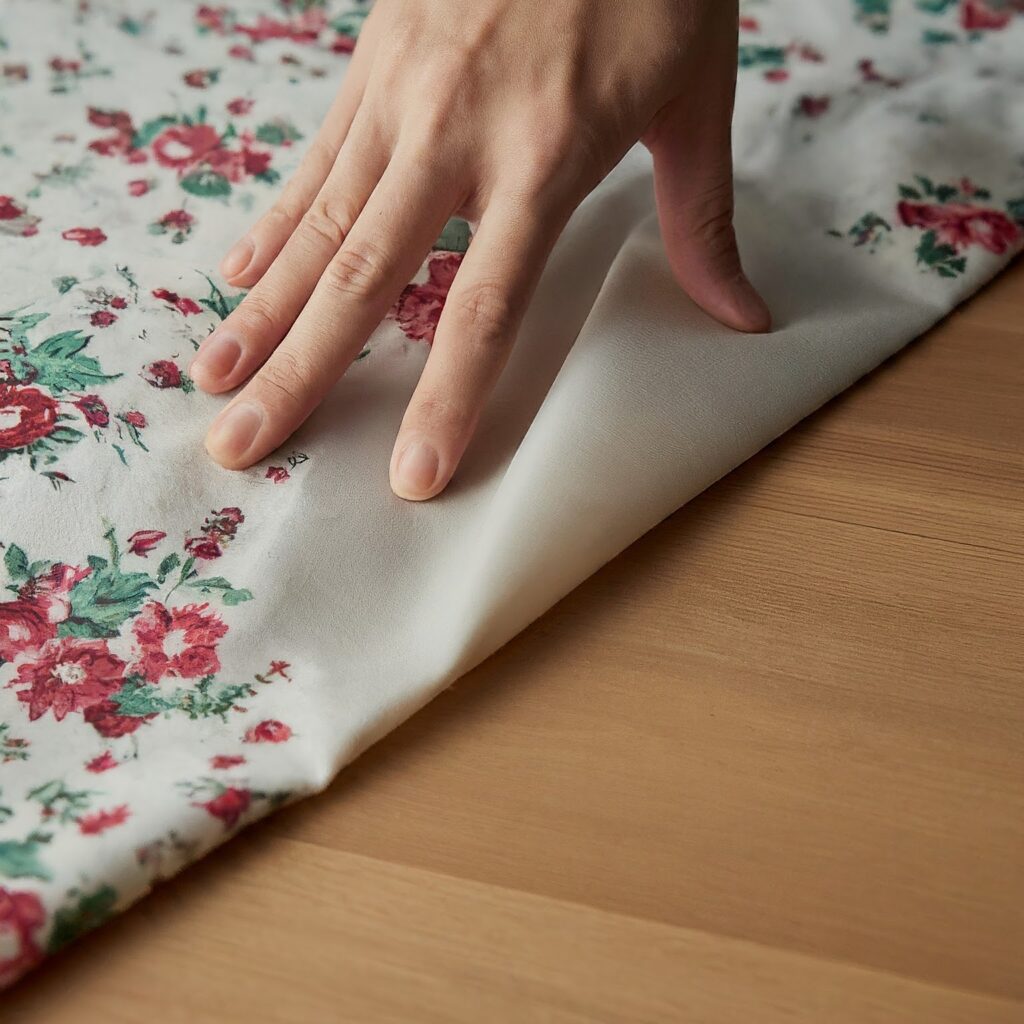
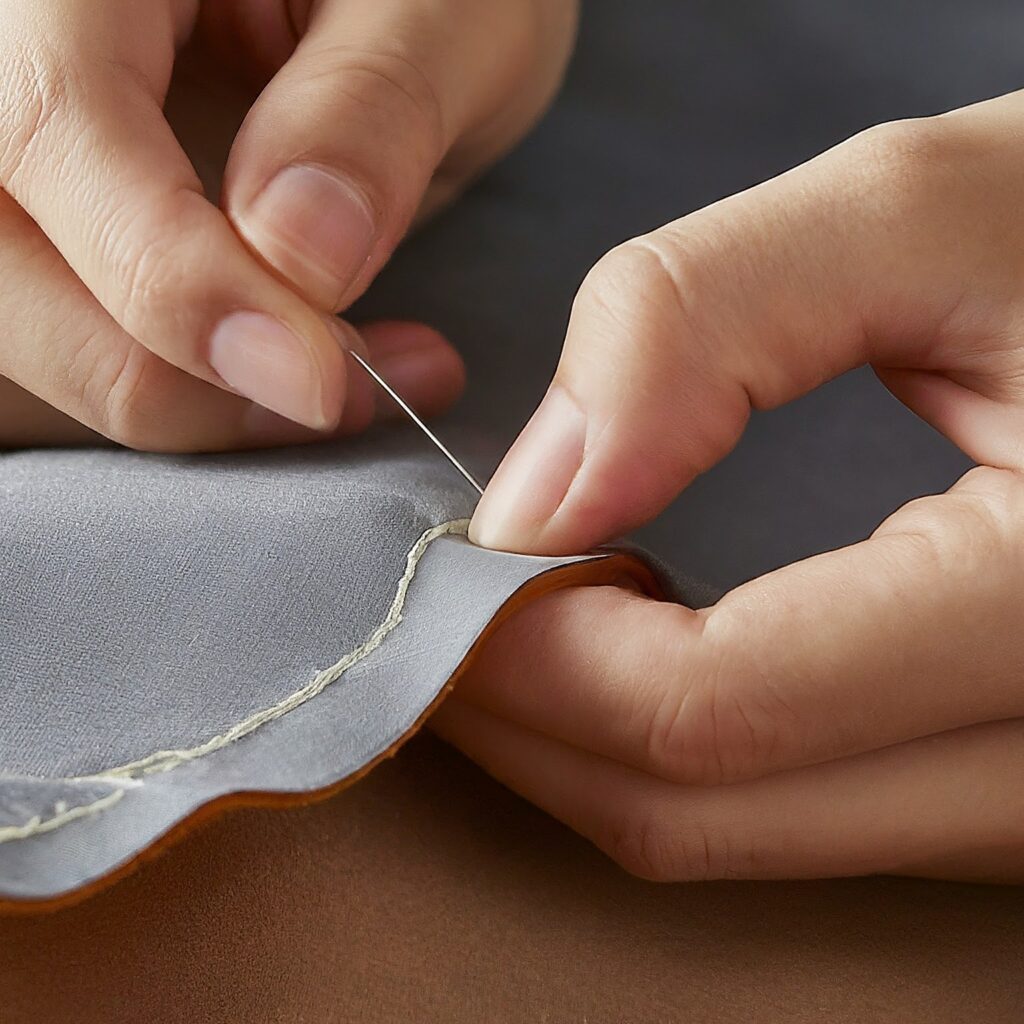
By incorporating the right interlining fabric, you’ll transform your simple bodice pieces into a structured masterpiece. With its added support and defined shape, your bodice will create a stunning silhouette that complements your unique style. Remember, practice makes perfect! Start with a simpler bodice design and experiment with different interlining weights and types, whether woven or non-woven, fusible or sew-in.
I hope this comprehensive guide empowers you to choose the best interlining fabric for your next structured bodice project.
Happy sewing!

Link of related Articles

shweta-textile-designer
Shweta, a textile designer with a keen eye and deep knowledge of fabrics, translates her passion into unique designs. She loves to share her expertise and ignite a love for textiles in others. Dive into the world of fabrics with Shweta!

Categories
Woven Interlinings

how to sew with non-woven interlining

Have you ever admired a garment with crisp collars, sharp lapels, or a beautifully defined silhouette? The secret weapon behind that professional look is often non-woven interlining. This magical interlining fabric adds structure and stability to your projects, taking them from flimsy to fabulous.

But don’t worry, using non-woven interlining isn’t some secret sewing society ritual. In this guide, I’ll walk you through everything you need to know, from choosing the right interlining to sewing it.

Table of Content

  • What is Non-Woven Interlining?
  • Why Use Non-Woven Interlining in Sewing Projects?
  • Choosing the Perfect Non-Woven Interlining for Your Needs
  • Preparing Your Fabric and Interlining
  • Sewing with Non-Woven Interlining: Step-by-Step Guide
  • Top Tips for Sewing with Non-Woven Interlining
  • Troubleshooting Common Issues with Non-Woven Interlining
  • Conclusion

What is Non-Woven Interlining?

Imagine a fabric that’s not quite fabric – that’s non-woven interlining! It’s a sheet-like material made by bonding fibers together. Unlike woven interlining fabrics, it doesn’t have a distinct grain or weave.

Non-woven interlining comes in various weights and types, offering different levels of structure and support to your sewing projects.

Why Use Non-Woven Interlining in Garments?

There are several reasons to incorporate non-woven interlining into your sewing repertoire:

  • Enhanced Structure: Interlining provides stability, preventing your fabric from sagging or drooping. This is especially crucial for collars, lapels, cuffs, waistbands, and other areas that need to maintain their shape.
  • Crisp Lines and Edges: Adding interlining creates crisp and defined edges, giving your garments that professional, polished look.
  • Improved Drape: The right interlining can actually improve the drape of your fabric, adding a touch of weight and fullness for a more flattering silhouette.
  • Durability: Interlining reinforces your fabric, making it more resistant to wear and tear. This is particularly important for garments that will see a lot of use.

Choosing the Perfect Non-Woven Interlining for Your Needs

Selecting the Non-Woven Interlining that perfectly complements your project! Here are some key factors to consider:

  • Weight of Interlining:
    • Lightweight: Ideal for delicate fabrics like chiffon or voile. Use lightweight interlining for collars, cuffs, and bodices of lighter garments where you want to maintain a soft drape.
    • Mediumweight: The workhorse interlining! It provides good structure for a variety of fabrics like cotton, linen, and lighter woolens. Perfect for collars, cuffs, waistbands, and jacket fronts.
    • Heavyweight: Offers significant support and stability, ideal for heavier fabrics like wool coats, structured bags, and tailored jackets.
  • Type of Interlining 
    1. Sew-in Interfacing: This type requires stitching it to your fabric for a permanent bond. It offers more flexibility during construction, allowing for precise placement on intricate shapes. Great for projects where you might need to adjust or remove the interlining later.
    2. Fusible Interfacing: This interlining has a heat-activated adhesive backing. Simply iron it onto your fabric for a quick and easy application. Perfect for beginners or projects where precise stitching isn’t critical.
  • Fabric Compatibility:Some interlinings are better suited for specific fabrics. For example, a Non-Woven fusible interlining designed for knits will stretch with the fabric, while a standard interlining might cause the knit to lose its elasticity. Always check the interlining label or consult with a fabric store employee for guidance on fabric compatibility.

Preparing Your Fabric and Interlining 

Before you dive into sewing, let’s get your fabric and interlining prepped for success:

  1. Pre-Wash Your Fabric : If your fabric is washable and you plan to wash the finished garment, pre-wash and dry it according to the fabric care instructions. This will help prevent the fabric from shrinking after you’ve attached the interlining.
  1. Iron Your Fabric: Give your fabric a good press to remove any wrinkles or creases. This ensures a smooth surface for attaching the interlining.
  2. Cut Your Interlining: Lay your fabric piece flat and use it as a template to cut out a matching piece of interlining. Make sure the interlining doesn’t extend beyond the seam allowance of your fabric piece, as this can create bulk in your seams.

Sewing with Non-Woven Interlining: Step-by-Step Guide

let’s explore how to sew with both sew-in and Non-Woven fusible interlining:

Sew-in Interfacing:

  1. Pin it Down: Place the wrong side (if it has one) of the interlining onto the wrong side of your fabric. Use straight pins to secure the interlining in place, ensuring it lies flat and wrinkle-free.
  2. Stitch it Up: Select a straight stitch on your sewing machine with a stitch length that matches the weight of your fabric. Choose a thread color that blends well with both the fabric and the interlining. Sew around the perimeter of the interlining, staying within your seam allowance. You can backstitch at the beginning and end of your stitching for added security.
  3. Finishing Touches: Carefully clip the curves of your interfacing piece to prevent bulk. If desired, you can also pink the edges of the interfacing to prevent fraying.

Non-Woven Fusible Interfacing:

  1. Heat Up Your Iron: Set your iron to the heat setting recommended for the specific interfacing you’re using. Consult the instructions on the interlining package for the ideal temperature.
  2. Position and Press: Place the interlining’s adhesive side onto the wrong side of your fabric. Following the manufacturer’s instructions, carefully press the iron onto the fabric for the recommended amount of time. Apply even pressure throughout the entire piece.
  3. Test and Secure : In some cases, the manufacturer might recommend stitching along the edges of the fused interlining for added security. You can test the bond by gently tugging on the interfacing to see if it lifts from the fabric. If needed, add a few stitches for peace of mind.

Top Tips for Sewing with Non-Woven Interlining

  • Practice Makes Perfect: Before tackling your main project, try sewing with a scrap of fabric and interlining to get the hang of it. This helps you perfect your technique and avoid mistakes on your final piece.
  • Needle Size Matters: Use a sharp needle that’s appropriate for the weight of your fabric. A dull needle can snag or damage the interlining.
  • Stitch Length Matters Too: For sew-in interlining, adjust your stitch length based on the weight of your fabric. A shorter stitch length provides more stability for heavier fabrics.
  • Go Slow and Steady: When sewing with interlining, take your time and stitch slowly. This ensures you get a clean and even stitch line.
  • Test on a Scrap: Before using any heat on your fabric, always test a scrap piece first to ensure the heat setting won’t damage or scorch your fabric.

Troubleshooting Common Issues with Non-Woven Interlining

  • Wrinkled Interlining: If your interlining gets wrinkled after ironing, don’t panic! You can try carefully smoothing it out with your iron on a low heat setting. If the wrinkles persist, you might need to replace the interlining piece.
  • Interlining Not Sticking (Fusible): This could be due to incorrect ironing temperature or pressure. Ensure your iron is set to the recommended heat setting and apply firm, even pressure while pressing.
  • Bulk in Seams: If your seams feel bulky after attaching the interlining, double-check that you trimmed the interlining within your seam allowance. You can also try using a thinner interlining or clipping the curves of the interfacing more aggressively.

Conclusion

By incorporating non-woven interlining into your sewing repertoire! From crisp collars to structured jackets, interlining adds a professional touch and elevates your sewing projects to the next level. With the knowledge and tips in this guide, you’re well on your way to becoming a master of garment construction!

Link of related Articles

shweta-textile-designer
Shweta, a textile designer with a keen eye and deep knowledge of fabrics, translates her passion into unique designs. She loves to share her expertise and ignite a love for textiles in others. Dive into the world of fabrics with Shweta!

Categories
Woven Interlinings

Types of buttons for blazers

Blazer buttons – those tiny yet impactful details – often go unnoticed. But trust me, they play a crucial role in elevating your blazer game. The right buttons can transform a simple blazer into a statement piece, reflecting your unique style and personality.

So, are you ready to unlock the secrets of blazer buttons

Table of Content

  • Blazer Buttons Functionality
  • Choosing the Right Blazer Buttons
  • Most Popular Blazer Button Materials 
  • Button Styles
  • Blazer Button Techniques 
  • Conclusion

Blazer Buttons Beyond Functionality

Sure, blazer buttons (and buttons for button coats and jackets) keep your garment closed, but their impact goes far beyond practicality. They act as the finishing touch, the punctuation mark to your sartorial sentence. The right buttons can:

  • Elevate Your Style: A simple switch from basic plastic buttons to sleek metal ones can instantly elevate your blazer  from casual to sophisticated.
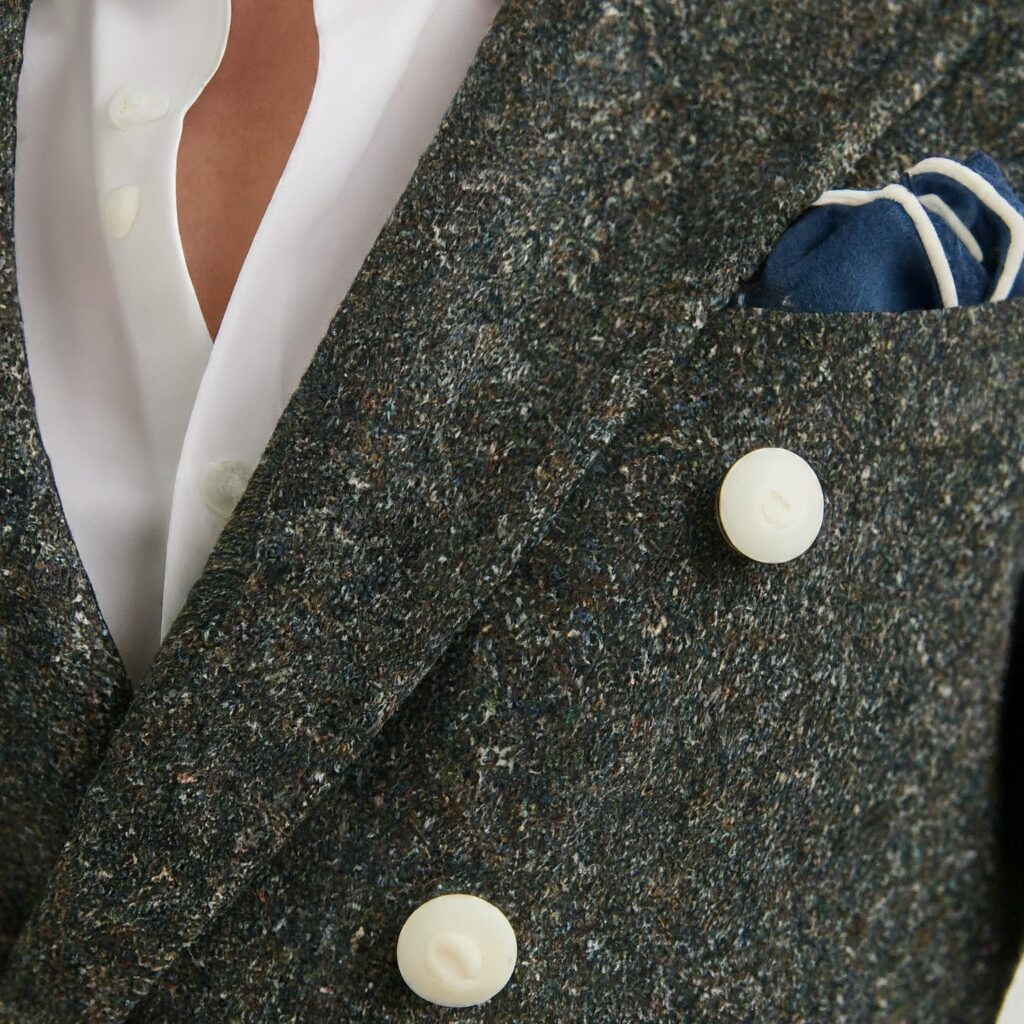
  • Complement Your Outfit: white buttons – a subtle detail that adds a touch of personality.

When selecting buttons for your blazer (or button coat or jacket), consider these key factors:

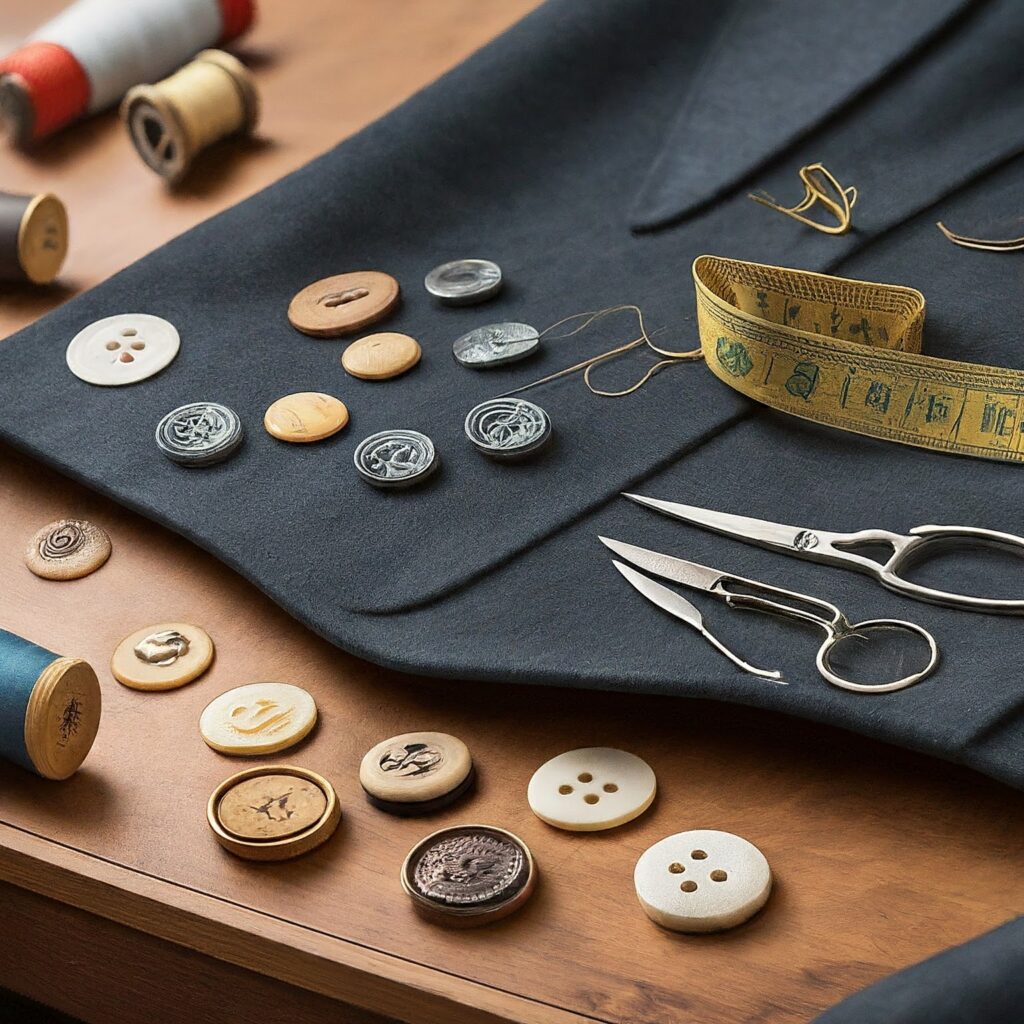
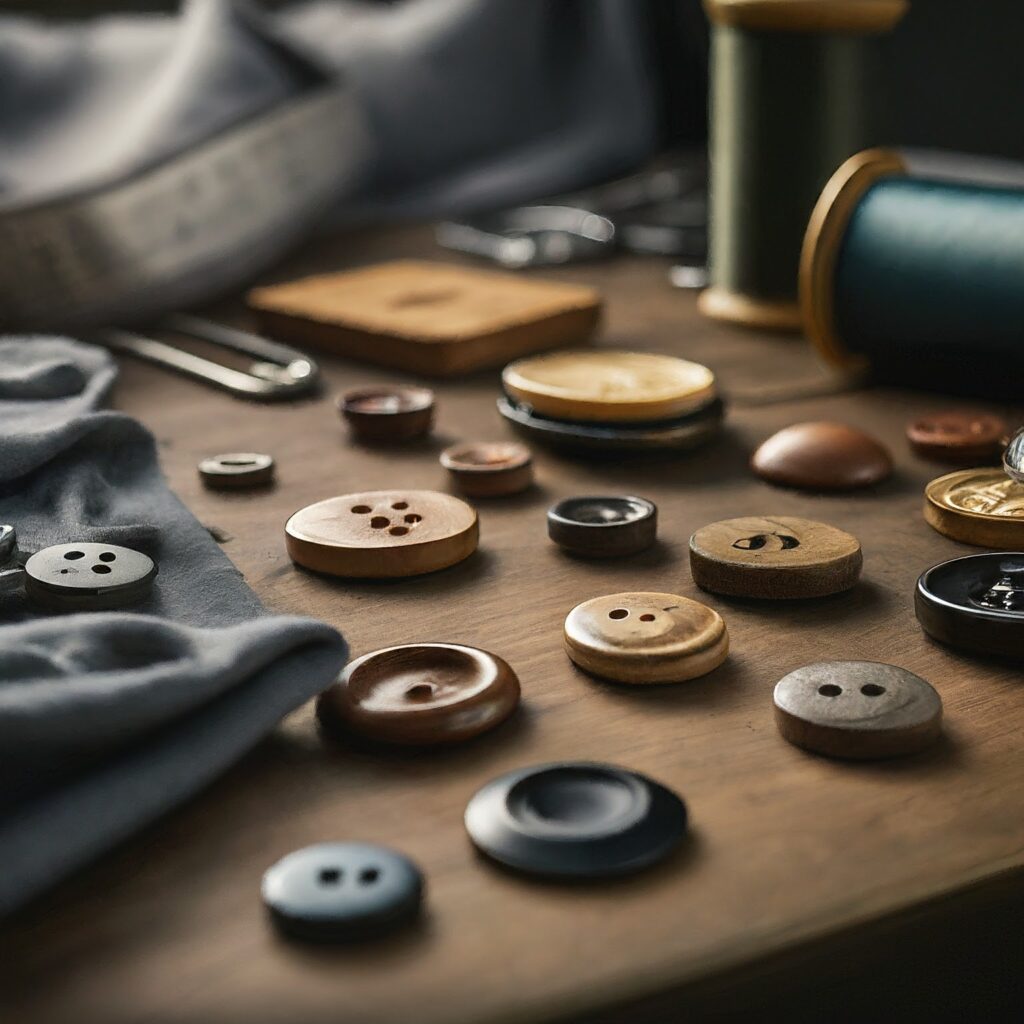
  • Material: The material of your button should complement the overall aesthetic of your garment. Consider natural materials like horn, wood, or mother-of-pearl for a touch of sophistication.
  • Size: The size of your button should be proportionate to the size and lapel width of your blazer .
  • Functionality: Think about how often you’ll be buttoning and unbuttoning your garment. Shank buttons are easier to manage with thicker fabrics.

Most Popular Blazer Button Styles 

Now that you’ve explored materials, let’s understand most popular Blazer Buttons

  • Classic Round Buttons: A timeless choice for a variety of blazers. They come in various materials and sizes, offering versatility.
  • Kissing Buttons: These small, closely spaced buttons create a minimalist and sleek look. Often seen on double-breasted blazers .
  • Square Buttons: A modern and edgy choice that adds a touch of personality to blazers, button coats, and jackets.
  • Sculpted Buttons: These buttons feature unique shapes and designs, perfect for creating a statement piece on blazers, button coats, and jackets.

When choosing a button style, consider the overall silhouette of your garment. 

Blazer Buttons Techniques 

Here are some advanced button techniques to explore that can be applied to blazers Buttons :

  • Contrasting Buttons: Use buttons that contrast with the color of your garment for a bold and eye-catching look. This works well on the blazers button.
  • Mixed Material Buttons: Combine different materials like metal and wood for a unique and textured effect. This can add a touch of personality to the blazers button.
  • Monogrammed Buttons: Add a personal touch with buttons featuring your initials or a small design. This is a great way to customize blazers, button coats, and even denim jackets.

Conclusion

Blazer buttons (and buttons for button coats and jackets) are more than just fasteners – they’re tiny style statements waiting to be unleashed. By understanding the different materials, styles, and techniques, you can transform your blazers, button coats, and jackets from ordinary to extraordinary.

Link of related Articles

shweta-textile-designer
Shweta, a textile designer with a keen eye and deep knowledge of fabrics, translates her passion into unique designs. She loves to share her expertise and ignite a love for textiles in others. Dive into the world of fabrics with Shweta!

Categories
Woven Interlinings

How to sew buttons on jackets

Popped Jacket button, It happens to the best of us. A favorite jacket suddenly feels incomplete, and you might be tempted to toss it aside. But hold on! Sewing on a jacket button is a surprisingly simple skill that anyone can learn. Not only will you save yourself some money, but you’ll also gain a sense of accomplishment and extend the life of your beloved jacket.

This guide will walk you through the button-sewing process step-by-step, from gathering your supplies to creating a secure and stylish attachment.

Table of Content

  • What You’ll Need
  • Choosing the Perfect Thread and Needle
  • Understanding Different Types
  • Sewing On Your Button
  • Pro Tips for Flawless Button Sewing
  • Troubleshooting Common Button Issues
  • Button Magic
  • Conclusion

What You’ll Need?

Essentials for your blazer button, coat button, or jacket button sewing project:

  • Needle: Opt for a sharp needle with a size appropriate for your jacket fabric (thicker fabrics require sturdier needles).
  • Thread: Choose a thread color that matches your button or one that disappears seamlessly into your jacket.
  • Scissors: Sharp scissors will help you snip thread cleanly.
  • Button: Use a spare button that matches the ones already on your blazer, coat, or jacket. Otherwise, select a button that complements the style and color of your garment.ur jacket. If not, select a button that complements the style and color of your jacket.

Choosing the Perfect Thread and Needle

Thread:

  • Strength: Match the thread strength to your jacket fabric. A lightweight cotton jacket wouldn’t require the same heavy-duty thread as a denim jacket.
  • Color: Classic approach – choose a thread color that blends in with your button and jacket.
  • Bold Approach: Select a thread color that complements or contrasts with the button for a more eye-catching look on your blazer, coat, or jacket.

Needle:

  • Size: Look for a needle size recommendation on the needle package, considering your fabric weight.
  • Sharpness: A dull needle will damage your fabric – opt for a sharp one for a smooth sewing experience.
  • Eye of the Needle: The needle’s eye should comfortably accommodate your chosen thread thickness.

Understanding Different Types

Some Button types you might encounter on your blazer, coat, or jacket:

  • Shank Buttons: These have a small space between the button and the fabric, allowing for easier buttoning and creating space for airflow.
  • Flat Buttons: These buttons sit flush against the fabric.
  • Snap Buttons: These involve two interlocking parts that snap together, requiring no sewing. Great for a quick and easy fix.
  • Toggle Buttons: These have a loop or bar that slides through a hole on the opposite side of the jacket.

For sewing purposes, shank buttons are generally the easiest to work with for beginners. Their built-in space allows for easier maneuvering of the needle and thread.

Sewing On Your Jacket Button

  1. Thread the Needle: Cut a length of thread about 18 inches long. Thread one end through the needle’s eye and pull it through until equal lengths remain on both sides. Tie a secure knot at the end of the thread.
  2. Position the Button: Turn your jacket inside out and locate the spot where the button was originally attached. If there’s a remaining thread shank, use it as a guide for button placement. Otherwise, position the button where it aligns with the buttonhole on the opposite side of the jacket.
  3. Start Sewing: Push the needle up from the wrong side (inside) of the jacket fabric, through one of the holes in the button. Gently pull the thread until the knot catches and the button sits flush against the fabric.
  4. Securing the Button: There are two main approaches here:
    • Basic Stitch: Repeat step 3, pushing the needle up through the fabric and another hole in the button, then back down through a different hole in the button and back into the fabric (on the wrong side) next to your first stitch. Continue sewing in this back-and-forth motion, creating small stitches that secure the button.
    • Shank Technique (for shank buttons): With the button positioned and secured with a few basic stitches, lay a toothpick or matchstick horizontally across the center of the button. This creates space for the shank. Continue sewing back and forth, making sure your stitches go over the toothpick

Pro Tips for Flawless Button Sewing

Here are some pro tips to elevate your button-sewing skills:

  • Double Your Knot: For extra security, tie a double knot at the end of your thread before starting to sew.
  • Even Stitches: Aim for consistent stitch size throughout, creating a neat and professional look.
  • Test the Tension: Pull your thread gently after each stitch to ensure it’s secure but not so tight that it puckers the fabric.
  • Finishing Touches: After securing the button, snip the thread close to the knot with your sharp scissors. You can also tuck the remaining thread under a few stitches on the backside for extra security.

Troubleshooting Common Button Issues

  • Missing Buttonhole: If the buttonhole is damaged or missing altogether, you might need to replace it. There are tools available specifically for creating buttonholes, or you can take your jacket to a tailor for a professional repair.
  • Loose Thread: Over time, threads can loosen. Simply follow the steps above to resew the button using a stronger thread or replacing the thread altogether.
  • Wrong Button Size: If your button is too big or small for the buttonhole, it might not function properly or look aesthetically pleasing. Invest in a button that matches the size of the existing buttonhole

Buttons Magic

Sewing on buttons can be more than just a repair task – it can be a chance to personalize your garment! By

  • Contrasting Thread: Use a vibrant thread color to add a pop of personality to your jacket.
  • Decorative Buttons: Experiment with buttons that have unique shapes, textures, or embellishments.
  • Button Clusters: Sew on a cluster of small buttons instead of a single large one for a more whimsical touch.

With a little practice and these helpful tips, you’ll be a button-sewing pro in no time! 

Conclusion

By following these steps and embracing the spirit of DIY repair, you’ve unlocked a valuable skill. Sewing on Jacket buttons is no longer a daunting task – it’s a quick fix that saves money and extends the life of your beloved jackets. 

So, the next time a Jacket button tries to escape, don’t despair! Grab your needle and thread, and get ready to celebrate a button up victory!

Link of related Articles

shweta-textile-designer
Shweta, a textile designer with a keen eye and deep knowledge of fabrics, translates her passion into unique designs. She loves to share her expertise and ignite a love for textiles in others. Dive into the world of fabrics with Shweta!

Categories
Woven Interlinings

Techniques for using woven interlining for crisp edges

Crisp edges add a touch of professionalism and polish that takes your creations to the next level. But achieving those perfectly sharp collars, cuffs, and waistbands can be a challenge, especially for beginners.

Table of Content

  • What is Woven Interlining?
  • Benefits of Using Woven Interlining for Crisp Edges
  • Choosing the Right Woven Interlining
  • Essential Techniques for Using Woven Interlining
  • Top Tips for Flawless Crisp Edges
  • Troubleshooting Common Mistakes
  • Conclusion: Woven Interlining – Your Secret Weapon for Crisp Edges

What is Woven Fusible Interlining?

Imagine a thin layer of fabric that acts like a supportive backbone for your main fabric. That’s essentially what woven interlining is. It’s crafted from woven threads, offering superior structure compared to its non-woven cousin. This makes it perfect for achieving those coveted crisp edges in key areas of your garments.

Benefits of Using Woven Interlining for Crisp Edges 

  • Superior Structure and Shape Retention: Woven interlining provides a firm foundation, preventing your fabric from becoming floppy or sagging. This translates to collars that stand tall, cuffs that stay put, and waistbands that hug your curves for a polished look.
  • Crisp Edges Made Easy: Forget endless pinning and wrestling with your fabric. Woven interlining acts as a guide, allowing you to achieve clean and defined edges with minimal effort.
  • Enhanced Drape: Despite adding structure, woven interlining typically retains some flexibility. This allows your fabric to drape beautifully, creating flowy silhouettes without sacrificing that crisp edge detail.
  • Durability and Wear Resistance: Woven interlining acts as a shield, protecting your fabric from wear and tear in areas like collars and cuffs. This translates to garments that look sharper for longer.

Choosing the Right Woven Interlining:

Choosing the right one for your project is crucial for achieving optimal results.

  • Fabric Weight: Match the interlining weight to the weight of your main fabric. For lightweight fabrics like cotton shirting, choose a lightweight interlining. Heavier fabrics like wool or denim require a medium-weight or heavyweight interlining for proper support.
  • Desired Level of Structure: Lighter interlinings offer a touch of structure, while heavier weights provide maximum support.
  • Project Type: Different garments require different levels of support. Lightweight interlinings are great for collars and cuffs in blouses, while medium-weight options are ideal for waistbands in trousers. Heavier interlinings work best for jackets and structured bags.

Here’s a handy table to help you navigate the selection process:

Fabric WeightWoven Interlining WeightUse Case
Lightweight (chiffon, voile)LightweightCollars, cuffs (for a subtle touch of structure)
Medium-weight (cotton, linen, lightweight denim)Lightweight to Medium-weightCollars, cuffs, waistbands in lighter garments
Heavyweight (denim, wool, heavy canvas)Medium-weight to HeavyweightStructured jackets, coats, waistbands in heavier garments

Essential Techniques for Using Woven Interlining:

The key steps for using woven interlining to achieve those crisp edges:

  1. Prepping Your Interlining: Start by cutting your interlining to match the exact shape of your fabric piece. Use sharp shears or a rotary cutter for clean edges. Some woven interlinings might require preshrinking to always follow the manufacturer’s instructions.
  2. Fusing the Interlining: Most woven interlinings are fusible, meaning they have a heat-activated adhesive backing. Following the manufacturer’s recommended temperature and time, iron the interlining onto the wrong side of your fabric.
  3. Securing the Edges: Once fused, pin the fabric and interline it together around the edges. 
  4. Sewing with Precision: Use a straight stitch or topstitch along the edges, depending on the desired finish. The interlining will provide a stable base for clean and precise stitch lines.

Top Tips for Flawless Crisp Edges:

  • Test on a Scrap: Always test the interlining on a scrap of your fabric. This allows you to practice your fusing technique and ensure compatibility with your fabric.
  • Seam Allowance Adjustments: Interlining adds a layer of thickness. When cutting your fabric pieces, consider adding slightly larger seam allowances to accommodate this. This ensures your garment maintains its intended fit and comfort level. Alternatively, trim seam allowances down slightly after fusing the interlining.
  • Sharp Tools Matter: Invest in a good pair of sharp shears or a rotary cutter to ensure clean and precise cuts for your interlining. Dull tools can lead to uneven edges and frustration.
  • Ironing Pressure is Key: Apply firm and even pressure with your iron while fusing the interlining. This ensures a secure bond between the interlining and your fabric.
  • Don’t Skip the Pressing Cloth: A pressing cloth acts as a barrier between your iron and your fabric, preventing scorching and distributing heat evenly.
  • Clipping Curves (Optional): For curved edges like collars or necklines, clip small notches into the interlining allowance before turning it under. This helps the fabric lie flat and prevents bunching.

Troubleshooting Common Mistakes:

Here are some common mistakes to watch out for and how to fix them:

  • Uneven Interlining Application: Ensure your interlining is cut accurately and lies flat on your fabric without wrinkles or bumps. Pin the interlining securely before fusing.
  • Skipping the Seam Allowance Increase: Remember to adjust your seam allowances to accommodate the added thickness of the interlining.
  • Incorrect Ironing Temperature/Time: Always follow the manufacturer’s instructions for your specific interlining to avoid incomplete adhesion or scorching.

Conclusion

By mastering the art of using woven interlining, you’ll unlock the power to create garments with professional-looking crisp edges. From perfectly tailored collars and cuffs to sharp waistbands, this technique elevates your sewing skills and adds a touch of polish to your creations. So, the next time you crave those coveted crisp edges, don’t hesitate to grab your woven interlining – it’s your secret weapon for sewing success!

Happy Sewing!

Link of related Articles

shweta-textile-designer
Shweta, a textile designer with a keen eye and deep knowledge of fabrics, translates her passion into unique designs. She loves to share her expertise and ignite a love for textiles in others. Dive into the world of fabrics with Shweta!

Categories
Woven Interlinings

Benefits of Using  Non-Woven Fusible Interlining

Ever dreamed of creating garments with crisp collars, sharp waistbands, and that perfect drape? Well, my friend, the secret lies in a little something called non-woven fusible interlining. This amazing material is your secret weapon for achieving professional looking garments, even if you’re a beginner!

Table of Content

  • What is Non-Woven Fusible Interlining?
  • What are the Benefits of Non-Woven Fusible Interlining?
  • Different Types of Non-Woven Fusible Interlining
  • Choosing the Right Non-Woven Fusible Interlining for Your Project
  • Advanced Tips for Using Non-Woven Fusible Interlining
  • Troubleshooting Common Interlining Mistakes

What is Non-Woven Fusible Interlining?

Imagine a thin layer of fabric that magically bonds to your main fabric with a touch of heat. That’s essentially what non-woven fusible interlining is. It’s a lightweight, web-like material made by fusing fibers together (think of it like a bonding party for tiny threads!). The magic part comes with the “fusible” element – it has a heat-activated adhesive backing that allows you to iron it directly onto your fabric. No more tedious stitching required!

What is Non-Woven Fusible Interlining?

The benefits of using non-woven fusible interlining are plentiful. 

  • Effortless Structure and Support:Non-woven interlining adds a layer of stability to your fabric, preventing it from becoming floppy or flimsy. This is especially crucial for areas like collars, cuffs, waistbands, and jacket fronts.
  • Enhanced Drape and Flow: Despite adding structure, non-woven interlinings are surprisingly lightweight and flexible. This means your garment can still maintain a beautiful drape, whether you’re working with flowy fabrics for a dress or a tailored silhouette for a blouse.
  • Durability You Can Count On: Garments go through a lot of wear and tear. Non-woven interlining acts like a protective shield, safeguarding your fabric from everyday friction and damage. This is especially important for areas like collars and cuffs, which experience a lot of movement. Interlined garments tend to last longer and look sharper for a longer period.
  • Sewing Made Easy:Non-woven interlining adds stability, prevents fabric bunching and allows for smoother stitching. This translates to cleaner lines and a more professional finish for your garments.
  • Versatility is Key: Non-woven fusible interlining isn’t just for specific types of garments. It’s a versatile tool that can be used in various projects. From collars and cuffs in shirts and blouses to waistbands and pockets in pants and skirts, this interlining can elevate a variety of garment construction needs.
  • Perfect for Beginners: Non-woven fusible interlining simplifies the process of adding structure and prevents the frustration of complicated sewing techniques. 

Different Types of Non-Woven Fusible Interlining:

Non-woven fusible interlinings come in different weights and types. Each is suited for a specific purpose, so choosing the right one makes all the difference.

  • Lightweight Interlining: Perfect for collars, cuffs, and pockets in lighter fabrics like blouses or shirts. It adds a touch of structure without compromising the drape.
  • Medium-Weight Interlining: A good choice for waistbands in pants and skirts, as well as collars and cuffs in heavier fabrics like jackets. It provides more support while maintaining some flexibility.
  • Heavyweight Interlining: This is the muscleman of interlinings. It’s ideal for jackets, coats, and structured bags. It offers maximum support and stability for areas that need to hold their shape.

Choosing the Right Non-Woven Fusible Interlining for Your Project

Fabric WeightNon-Woven Fusible Interlining WeightUse Case
Lightweight (chiffon, voile)LightweightCollars, cuffs, pockets (for a subtle touch of structure)
Medium-weight (cotton, linen)Lightweight to Medium-weightCollars, cuffs, waistbands, lighter jackets
Heavyweight (denim, wool)Medium-weight to HeavyweightWaistbands, structured jackets, bags

Advanced Tips for Using Non-Woven Fusible Interlining

some advanced tips to take your interlining skills to the next level:

  • Preshrink Interlining: Some non-woven interlinings, especially those made with natural fibers, can shrink with heat exposure. To avoid a misshapen garment, preshrink your interlining by washing and drying it according to the manufacturer’s instructions before fusing it to your fabric.
  • Test on Scrap Fabric: Before tackling your entire project, always test the interlining on a scrap of your fabric. This allows you to practice your ironing technique and ensure the chosen interlining works well with your fabric weight and drape.
  • Layering for Extra Support: For ultimate structure in heavier garments like jackets or coats, you can layer two or more types of interlining. Experiment with different combinations of lightweight and medium-weight interlinings to achieve the desired level of support and stiffness.
  • Shaping with Interlining: Think beyond just basic structure! Use interlining strategically to create specific shapes and add dimension to your garments.

For Example: 

  • Rounded Collars: Cut away a small wedge of interlining at the neckline to achieve a gentler curve on your collar.
  • Sharp Lapels: Use a stiffer interlining for the lapel area and a softer one for the body of the jacket to create a crisp, defined lapel.

Troubleshooting Common Interlining Mistakes:

Here are some common mistakes to watch out for and how to fix them:

  • Uneven Interlining Application: Ensure your interlining is cut accurately to match your fabric piece. Use sharp shears or a rotary cutter for clean edges. Pin the interlining to your fabric, making sure it lies flat and smooth without any wrinkles or bumps. When fusing, use a pressing cloth and apply even pressure with your iron.
  • Skipping the Seam Allowance Increase: Interlining adds a layer of thickness. When cutting your fabric pieces, consider adding slightly larger seam allowances to accommodate this. This ensures your garment maintains its intended fit and comfort level.
  • Incorrect Ironing Temperature/Time: Always follow the manufacturer’s instructions for ironing temperature and time. Using the wrong settings can result in incomplete adhesion or scorching of your fabric.

Conclusion

By incorporating non-woven fusible interlining into your sewing projects, From professional-looking structure and support to effortless application and enhanced durability, this versatile tool becomes a valuable asset in your sewing arsenal. With a little practice and these handy tips, you’ll be creating flawless garments with confidence in no time!

Happy Sewing!

Link of related Articles

shweta-textile-designer
Shweta, a textile designer with a keen eye and deep knowledge of fabrics, translates her passion into unique designs. She loves to share her expertise and ignite a love for textiles in others. Dive into the world of fabrics with Shweta!

Categories
Woven Interlinings

Conquer Collars! Find the Perfect Interlining for Your Shirt 

The collar of a shirt is like a picture frame – it sets the tone for the entire garment. A crisp, well-structured collar elevates your look and exudes confidence, while a limp, floppy collar can detract from the overall impression. But achieving that perfect collar silhouette requires a hidden hero: collar interlining.

This guide dives deep into the world of collar interlining for different shirt types. We’ll explore the best options for dress shirts, button-down shirts, polo shirts, and more. You’ll learn how to choose the right interfacing material based on the desired collar look, fabric weight, and your sewing skills. So, grab your sewing kit and a cup of tea, and let’s find the perfect interlining match for your next shirt project!

  • Table of Contents

    • What is Collar Interlining?
    • Benefits of Using Collar Interlining
    • Choosing the Right Collar Interlining for Your Shirt Type:
      • Dress Shirts
      • Button-Down Shirts
      • Polo Shirts
      • Casual Shirts
      • Linen Shirts

What is Collar Interlining?

Imagine a beautifully crafted shirt, but the collar flops over limply. Not exactly the picture of sophistication, right? Collar interlining steps in to solve this problem. It’s a layer of material sandwiched between the outer fabric and the lining (or directly attached to the outer fabric if there’s no lining) specifically designed for collars. It provides essential structure and support, allowing the collar to:

  • Maintain its Shape: Collar interlining prevents the fabric from sagging or collapsing, keeping your collars crisp and defined.
  • Stand Up Straight: Especially important for structured collars like stand collars or lapels, collar interlining ensures a professional, upright look.
  • Enhance Drape: Depending on the material and weight of the interlining, it can even influence the drape of the collar, creating a softer or more structured effect.

Benefits of Using Collar Interlining

  • Professional Look: Crisp, defined collars elevate the overall look of your shirt, adding a touch of polish and sophistication.
  • Improved Drape: Collar interlining helps the collar drape beautifully, whether you desire a sharp and structured look or a softer, more relaxed feel.
  • Enhanced Durability: By preventing fraying and adding structure, collar interlining helps your shirts last longer.
  • Easier Sewing Experience: Collars can be tricky to sew, especially with lightweight or flimsy fabrics. Fusible interlining or sew-in interfacing adds stability, making sewing curves and achieving sharp points on the collar much easier.

Choosing the Right Collar Interlining for Your Shirt Type:

Now that you understand the importance of collar interlining, let’s explore the different types available and how to choose the best option for specific shirt styles.

Interlining

Dress Shirts

Dress shirts are all about creating a polished, professional look. For crisp, structured collars that stand tall, consider these interlining options:

  • Woven Fusible Interlining: This is a popular choice for dress shirts. Woven Fusible Interlining provides excellent hold and crispness, ideal for stand collars and tailored collars.
  • Peltex Interfacing: This heavyweight, non-woven interfacing offers exceptional stability and shaping capabilities, perfect for achieving that sharp, formal look..

Button-Down Shirts

Button-down shirts offer a more relaxed feel compared to dress shirts. However, you might still want some structure in the collar to avoid a floppy look. Here are some interlining options to consider:

  • Non-Woven Fusible Interlining: Non-Woven Fusible Interlining interfacing offers moderate structure with a softer drape, perfect for button-down shirts that require some shaping but not extreme stiffness.

  • Woven Fusible Interlining (Lighter Weight): If you prefer a slightly softer structure, choose a lighter weight option within the woven fusible interlining category achieving a relaxed collar with collar interlining

Polo Shirts

Polo shirts typically have a more casual collar style. However, a little bit of interlining can prevent the collar from curling or losing its shape.

Lining:

  • Sew-in Interfacing (Lightweight): This offers more flexibility and allows for a softer collar drape, perfect for the casual style of polo shirts.
  • Lightweight Fusible Interlining: A lightweight fusible option can also be a good choice for polo shirts, providing a bit of structure without adding bulk.

Casual Shirts

Casual shirts come in a wide variety of styles and fabrics. The choice of interlining will depend on the desired look and fabric weight.

  • Linen Shirts: Linen is a popular choice for casual shirts due to its breathability and natural drape. However, it can wrinkle easily. Consider a very lightweight fusible interlining or sew-in interfacing made from natural fibers to add a bit of structure without compromising the breathability of the linen.
  • Chambray Shirts: Chambray is a lightweight denim fabric often used for casual shirts. A lightweight fusible interlining or sew-in interfacing made from cotton or a cotton blend can provide some structure without adding too much stiffness.
  • Flannel Shirts: Flannel is a thicker, warmer fabric often used for casual shirts. A heavier sew-in interfacing or a medium-weight fusible interlining can help the collar hold its shape without compromising the coziness of the flannel.

Woven Fusible vs. Non-Woven Fusible Interlining: A Decision-Making Guide

Now that you’ve explored the pros and cons of both woven and non-woven fusible interlining, let’s put this knowledge into action! Here’s a handy guide to help you choose the perfect interfacing for your next project:

  • Project Requirements: Consider the level of structure your project needs. Does it require crisp lines and defined shapes (woven fusible) or a softer drape (non-woven fusible)?.
  • Budget: Consider the cost of the interfacing and factor it into your overall project budget.
  • Ease of Use: If you’re a beginner, non-woven fusible interlining with pre-cut shapes might be a good starting point.
  • Sustainability: Consider using woven fusible interlining naturally or recycled non-woven fusible interlining for a more eco-friendly approach, if it suits your project needs

Fusible vs. Non-Fusible Interlining: Understanding the Differences

Now that we’ve explored specific interlining options for different shirt styles, let’s delve into the two main categories: fusible and non-fusible (also known as sew-in) interfacing.

Fusible Interlining:

  • Application: Heat-activated. Requires ironing the interfacing onto the wrong side of the fabric using a pressing cloth for protection.
  • Benefits: Easy and quick to apply, ideal for beginners. Creates a smooth, clean finish on the inside of the collar.
  • Drawbacks: May not be suitable for all fabrics, especially those sensitive to heat. Bond strength can deteriorate over time with repeated washing and drying.

Non-Fusible (Sew-in) Interfacing:

  • Application: Sewn directly onto the wrong side of the fabric using a sewing machine.
  • Benefits: Offers more control and customization in terms of structure and drape. More durable option compared to fusible interfacing.
  • Drawbacks: Requires sewing skills and additional time compared to fusible interfacing. Can leave visible stitching lines on the inside of the collar.

Naturally:

Some sewers prefer to use naturally-derived materials (Interlining)for their interfacing, especially for shirts made from organic or breathable fabrics. Here are some options:

  • Cotton Fusible Interlining: A popular choice for those who prefer a natural alternative to synthetic fusible interfacing.
  • Sew-in Interfacing made from Rayon or Linen: Offers a lightweight and breathable option for collars that require some structure without compromising breathability.

Remember

 When choosing between fusible and non-fusible interfacing, consider your sewing skills, the desired collar look and fabric type, and your personal preference for natural materials.

Conclusion

Collar interlining is a valuable tool in your sewing arsenal. By understanding the different types of materials available (fusible interlining, sew-in interfacing), how to choose the right one for your specific shirt type (dress shirts, button-down shirts, polo shirts, casual shirts), and the application methods, you can create collars that are both beautiful and functional. So, grab your fabric, interlining, and sewing machine, and get ready to create shirts that will leave a lasting impression!

shweta-textile-designer

Shweta, a textile designer with a keen eye and deep knowledge of fabrics, translates her passion into unique designs. She loves to share her expertise and ignite a love for textiles in others. Dive into the world of fabrics with Shweta!

Categories
Woven Interlinings

Differences in Lining and Interlining Fabric

Unveiling the Differences Between Lining and Interlining Fabric Naturally

Have you ever peeked inside a beautifully crafted garment and wondered what goes into creating that smooth, structured feel? It’s not just about the stunning outer fabric – hidden beneath the surface lie two secret weapons: lining and interlining. But what exactly are they, and how do they differ? Don’t worry, fellow sewing enthusiast, this guide will unveil the mysteries of lining and interlining fabric, helping you decide which one (or both!) is perfect for your next sewing project, with a focus on natural and eco-friendly options.

Unveiling the Differences Between Lining and Interlining Fabric Naturally
  • Understanding Lining & Interlinin

    • Lining: The Comfort Champion

    • Interlining: The Structure Superhero

  • Unveiling the Key Differences: Lining vs. Interlining Fabric

    • Location & Purpose

    • Material & Texture

    • Benefits & Drawbacks

    • When to Use Each Fabric

Understanding Lining & Interlining

Lining and interlining might sound similar, but they serve distinct purposes in garment construction. Here’s a breakdown:

Lining: The Comfort Champion 

Imagine slipping into a luxurious coat, the fabric soft and smooth against your skin. That’s the magic of a lining! A lining is a separate layer of fabric sewn to the inside of a garment, typically on the bodice, sleeves, and skirt. Here are the key benefits it offers:

  • Comfort: Lining prevents the outer fabric from feeling rough or scratchy against your skin, especially with heavier materials like wool or tweed.

  • Durability: A lining acts as a protective barrier, shielding the outer fabric from wear and tear caused by sweat, friction, and everyday use.

  • Shape Retention: Lining can add a bit of body and stability to garments, helping them maintain their shape and drape.

  • Finishing Touch: Lining adds a touch of refinement and quality to a garment, often featuring a contrasting color or pattern for a unique style statement.

Interlining: The Structure Superhero 

Interlining fabric, on the other hand, is a hidden hero that works its magic within the layers of a garment. It’s a layer of material sandwiched between the outer fabric and the lining (or directly attached to the outer fabric if there’s no lining). Unlike lining, interlining is all about structure and support:

  • Structured Shapes: Interlining provides essential support for achieving specific shapes and silhouettes. Think crisp collars, sharp lapels on jackets, or structured bodices for dresses.

  • Fray Prevention: Raw edges on inner seams can fray over time. Interlining acts as a barrier, preventing fraying and adding stability to the construction.

Interlining

Unveiling the Key Differences: Lining vs. Interlining Fabric

Now that you understand the basic roles of lining and interlining, let’s delve deeper into their specific differences:

Location & Purpose:

  • Lining: Sewn to the inside of a garment, visible when worn (unless completely covered by another layer). Its primary purpose is to enhance comfort, durability, and add a finishing touch.

  • Interlining (Interlining fabric): Sandwiched between the outer fabric and the lining (or directly attached to the outer fabric if there’s no lining). It’s hidden from view and focuses on providing structure and support.

Material & Texture:

  • Lining: Typically made from lightweight, breathable fabrics like cotton, silk, rayon, or polyester. They come in a variety of textures, from smooth and silky to slightly textured.

  • Interlining (Interlining fabric): Available in woven or non-woven options, with varying degrees of weight and stiffness. Common materials include woven fusible interlining (for crispness), non-woven fusible interlining (for softer drape), and sew-in interfacing (for more control). Natural interlining options include recycled materials or natural fiber blends. Look for options like “collar interlining naturally” for a sustainable touch.

 When to Use Each Fabric 

Here’s when to consider using lining and interlining fabric, with a focus on natural options:

Lining:

  • Heavyweight Fabrics: Lining is a good choice for garments made from heavier fabrics like wool or tweed, as it prevents them from feeling rough against the skin. Consider natural linings like organic cotton or linen for breathability and comfort.

  • Close-fitting Garments: Lining is ideal for dresses, skirts, and pants that fit close to the body, as it provides extra comfort and prevents the outer fabric from clinging. Explore linings made from bamboo for its moisture-wicking properties, perfect for activewear.

Interlining Fabric Naturally:

When looking for interlining, explore options that are kinder to the environment:

  • Recycled Polyester Interlining: Look for interlining made from recycled plastic bottles, offering a more sustainable alternative to traditional polyester interlining.

  • Natural Fiber Blends: Explore interlining options that combine natural fibers like cotton or wool with other materials for a balance of structure and eco-friendliness.

  • Plant-Based Interlining: Consider options made from bamboo or even cork, which offer surprising structure and are biodegradable. These may not be suitable for projects requiring extreme stiffness.

Types of Interlining Fabric Natrually :

    • Fusible Interlining Naturally: While traditional fusible interlining is often synthetic, some brands offer options made with natural adhesives.
    • Sew-in Interfacing Naturally: This type of interlining allows for more control during sewing and can be made from natural materials like cotton or wool. Look for options labeled collar interlining naturally for a sustainable touch in structured collars.

Remember: When choosing interlining fabrics naturally, consider the desired level of stiffness and breathability for your project.

Choosing the Right Fabric of Your Project

Now that you understand the key differences between lining and interlining fabric, you’re ready to choose the right fabric for your next sewing project! Here are some additional tips

  • Lining: Consider the weight and breathability of both the lining and outer fabric. Opt for breathable options like organic cotton or rayon for close-fitting garments. Think about the desired look and feel – do you want a classic, smooth lining or a more textured accent piece made from a natural fabric?

  • Interlining Fabric Naturally: Choose the weight and stiffness based on the desired structure and the outer fabric’s weight. Consider recycled polyester interlining or natural fiber blends for a balance of structure and sustainability. Sew-in interfacing naturally allows for more control during sewing.

Remember

Don’t be afraid to experiment! Consider the specific needs of your project and explore different lining and interlining options to achieve the perfect combination of comfort, structure, and style, while prioritizing natural and eco-friendly materials.

Conclusion

Lining and interlining are essential tools in any sewing enthusiast’s arsenal. By understanding the distinct roles they play in garment construction and prioritizing natural and eco-friendly options, you can create beautiful garments that are comfortable, well-structured, and made with a conscience towards the environment. So, get out there, experiment with different lining and interlining options naturally, and unlock a world of creative possibilities!

 Happy sewing

shweta-textile-designer

Shweta, a textile designer with a keen eye and deep knowledge of fabrics, translates her passion into unique designs. She loves to share her expertise and ignite a love for textiles in others. Dive into the world of fabrics with Shweta!